
Configure Windows Hello for Business in Microsoft Entra ID
![]()
| Version Number | Date | Change Description |
|---|---|---|
| 1.1 | 08/14/2023 | Remove security key as an option. Add a "why" section and lessons learned. |
| 1.0 | 05/25/2023 | Initial Draft. |
The purpose of this playbook is to guide ICAM program managers and Microsoft Entra ID administrators through planning, configuring, testing, and implementing a Windows Hello for Business (WHfB) configuration when devices are cloud-joined. WHfB also allows design for hybrid-joined devices. Hybrid-joined relies on either a 3rd party mobile device manager or Windows devices managed through an on-premise Microsoft Entra ID. This configuration can be more complex and architecture-specific. Due to this, the playbook only covers a cloud-join configuration. WHfB offers two-factor authentication by combining a device authenticator (something you have) and either a PIN (something you know) or a biometric (something you are).
Why Windows Hello for Business
Windows Hello for Business is a phishing-resistant FIDO2 platform authenticator native to Microsoft Entra ID that does not require additional hardware or software. It is an alternative authenticator for use cases where using PIV is impractical. An agency could also develop a Derived PIV solution for WHfB requiring PIV authentication before registering WHfB. Some everyday use cases where PIV is impractical or unavailable may include the following:
- Agency staff completing a fitness determination and eligible to begin work. However, issuing a PIV card may take weeks or months due to supply chain issues or proximity to a PIV issuance station.
- Agency staff who’ve lost or damaged their PIV card and need a temporary authenticator until they can get a new PIV card.
- Short-term staff who are not eligible for a PIV card.
- Mobile or personal device access where using a smart card or Derived PIV is impractical due to form factor, technology, or cost limitations.
Traditionally in these scenarios, agencies leverage a policy exception process where the exception authenticator is either a time-limited username and password or a One-Time Pin. Unfortunately, these exception authenticators are susceptible to sophisticated phishing attacks, which can convincingly spoof official applications and involve dynamic user interaction. Users can be fooled into providing a one-time code or responding to a security prompt that grants the attacker account access. These attacks can be fully automated and operate cheaply at a significant scale.
Lessons Learned from FIDO2 Community of Action
The FIDO2 Community of Action is an Office of Management and Budget initiative to help agencies rapidly replace exception authenticators with a phishing-resistant alternative either as an alternative or a backup authenticator. The most common authenticators piloted by the CoA agencies include WHfB, FIDO2 security keys, and Derived PIV on a government mobile device or a FIDO2 security key. For common questions with WHfB, see the FAQs. Below is a list of lessons learned from CoA agencies in the piloting and production use of WHfB.
- Depending on the size of your agency, the prerequisites to using WHfB could be a major technology shift. The most time-intensive activity includes migrating device management to Microsoft Entra ID, or a Microsoft Entra Hydrid join, which also means becoming comfortable with leveraging Azure group policies over traditional Microsoft Group Policy Object.
- Migrating to a complete cloud Azure configuration with Microsoft Entra joined devices is possible for agencies with a small on-premise Microsoft Entra ID footprint. This alleviates the risk of Microsoft Entra ID vulnerabilities, but agencies must ensure they have the right talent and understanding of Entra ID operations and constraints.
- Most agencies have adequate licensing (usually E3 or E5) to leverage conditional access policies and automated device enrollment. It is not required to use WHfB but does help with other security priorities to integrate device-level signals and better user experience.
- Once enabled, WHfB provides a more natural authentication experience when using biometrics. Biometrics requires a compatible Windows device.
- WHfB is only supported on Windows devices as of June 16th, 2023. For phishing-resistant MFA on mobile devices to Azure, only security keys is supported.
About Windows Hello for Business
Windows Hello for Business distinctly differs from the consumer version of Windows Hello.
From Microsoft, “Windows Hello represents the biometric framework provided in Windows. Windows Hello lets users use biometrics to sign in to their devices by securely storing their user name and password and releasing it for authentication when they successfully identify themselves using biometrics. Windows Hello for Business uses asymmetric keys protected by the device’s security module that requires a user gesture (PIN or biometrics) to authenticate.”
WHfB is also separate from Certificate-Based Authentication and security keys.
Windows Hello for Business Sign-in Options
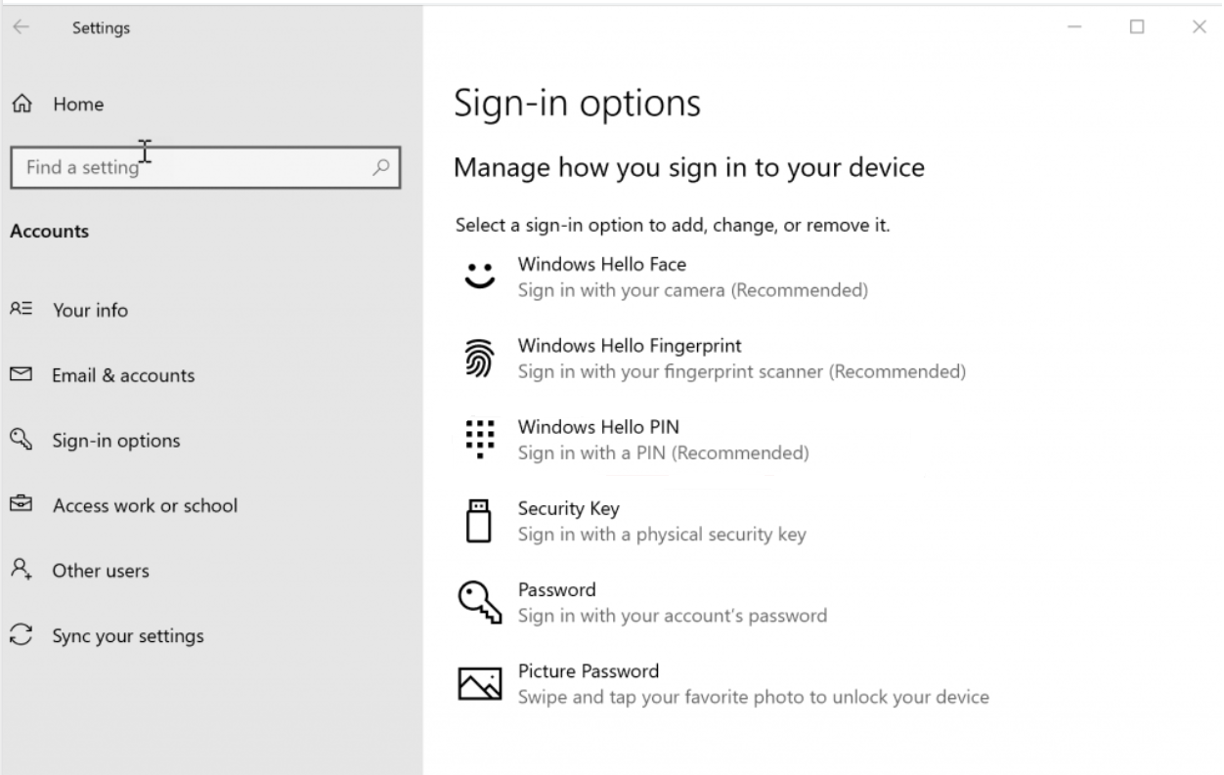
The available sign-in options for Windows Hello for Business include the following:
- Facial recognition
- Fingerprint recognition
- PIN (for use as a backup in case the biometric authentication fails or in the absence of camera/fingerprint scanning technology)
WHfB PINs may seem similar to passwords at first glance. However, there is a fundamental difference: PINs typically are local to the device and not transmitted over the internet, unlike a Microsoft 365 or Microsoft Entra ID (ME-ID) User Principal Name and Password combination. Device PIN creation establishes a trusted relationship with the identity provider (ME-ID). It also creates an asymmetric key pair that is used for authentication. Transmittal of the public key to the authentication server completes the sign-in request. When paired with a Trusted Platform Module (TPM) chip, tamper protection is enabled. This feature protects the key material from attackers and locks the device after too many incorrect PIN attempts. Biometric data is stored locally on the device and never sent to external devices or servers. As stated previously, authentication occurs via the asymmetric key. Users can delete or remove their biometric information by visiting Settings > Accounts > Sign-in options.
Assumptions
This playbook assumes that devices are cloud-only joined and that no hybrid configuration with Microsoft Entra ID exists. Hybrid deployments come in multiple designs with constraints based on on-premise components. This playbook is meant to support agencies in implementing the Federal Zero Trust Strategy action steps for application action and reducing the use of network authentication. Deploying Windows Hello for Business in a hybrid environment comes in four configurations driven by how devices are managed.
- Cloud kerberos trust
- Key trust
- Certificate trust, mixed managed
- Certificate Trust, modern managed
These hybrid deployments require configuring Microsoft Entra Connect, Microsoft Entra Kerberos and deploying either a Cloud Trust Device Configuration Profile in Microsoft Intune (Intune), a Key trust deployment in on-premises Microsoft Entra ID, or a hybrid certificate trust deployment, which requires Active Directory Federated Services (ADFS). Of these three hybrid options, the Cloud Kerberos trust deployment is recommended.
Prerequisites
For cloud-joined deployment, this playbook assumes that:
- all devices have a TPM 2.0 module that complies with Federal Information Processing Standards (FIPS). All devices should be on Windows 10 version 1709 (or later) or Windows 11. Preferably, all devices should be Windows 10 version 1903 or later.
- Devices are equipped with an infrared camera or fingerprint reader for biometric authentication.
- Microsoft Intune (Intune) is the Windows MDM solution.
- Not required, but it’s preferable that all users have an Microsoft Entra Premium P1 or P2 subscription, which is needed for automatic MDM enrollment when the device joins Entra ID. Microsoft Entra Premium P1 licenses also grant access to Microsoft Entra multifactor authentication (MFA) through Conditional Access policies.
Technology and terms
See this Microsoft primer on Introduction to device identity and join types
Join type
Join type refers to how devices are associated with Entra ID. For a device to authenticate to Microsoft Entra ID, it must be registered or joined.
Registering a device to Microsoft Entra ID enables you to manage a device’s identity. When a device is registered, Microsoft Entra ID device registration provides the device with an identity that is used to authenticate the device when a user signs in to Microsoft Entra ID. You can use the identity to enable or disable a device.
When combined with a mobile device management (MDM) solution such as Microsoft Intune, the device attributes in Microsoft Entra ID are updated with additional information about the device. This feature allows you to create conditional access rules that enforce access from devices to meet your standards for security and compliance. For more information on enrolling devices in Microsoft Intune, see Enroll devices for management in Intune in Intune.
Joining a device is an extension to registering a device. It provides you with all the benefits of registering a device and changes the local state of a device. Changing the local state enables users to sign in to a device using an organizational, work, or school account instead of a personal account.
Microsoft Entra ID registration
Microsoft Entra ID registered devices support the bring your own device (BYOD) scenario. In BYOD, a user can access your organization’s Microsoft Entra ID controlled resources using a personal device.
Learn more about Microsoft Entra ID registered devices here.
Microsoft Entra ID join
Microsoft Entra ID join is intended for organizations that desire to be cloud-first or cloud-only. There’s no restriction on the size or type of organizations that can deploy Microsoft Entra ID join. Microsoft Entra ID join also works in a hybrid environment and can enable access to on-premises applications and resources.
Learn more about Microsoft Entra ID joined devices.
Microsoft Entra ID Hybrid join
For more than a decade, organizations have used the domain join to their on-premises Microsoft Entra ID to enable:
- IT departments to manage work-owned devices from a central location.
- Users to sign in to their devices with their Microsoft Entra ID work or school accounts.
Typically, organizations with an on-premises footprint rely on imaging methods to provision devices, and they often use or group policy to manage them.
If your environment has an on-premises AD footprint and you want to benefit from the capabilities provided by Microsoft Entra ID, you can implement Microsoft Entra Hybrid joined devices. These devices are joined to both your on-premises Microsoft Entra Hydrid and your Microsoft Entra ID.
Learn more about Microsoft Entra Hybrid joined devices.
Mobile device management
Device management enables organizations to administer and maintain devices, including virtual machines, physical computers, mobile devices, and IoT devices. Microsoft Intune is the mobile device management (MDM) solution for the Microsoft 365 platform.
Prepare users to use Windows Hello
Using Windows Hello and biometrics
If organization policy allows, users can employ biometrics (fingerprint and facial recognition) with WHfB, if the hardware supports it. Figure 1 displays the sign-in options available with WHfB.
Figure 1: Windows Hello Sign-in Options
In establishing a policy requiring WHfB use in the workplace, you must educate users on how to use WHfB.
After enrolling in WHfB, users should use their gesture (such as a PIN or fingerprint) for access to corporate resources. This gesture is only valid on the enrolled device.
Although the organization may require users to change their Microsoft Entra ID or Microsoft Entra ID account password at regular intervals, password changes will not affect WHfB.
Individuals using virtual or physical smart cards for authentication can use their virtual smart card to verify their identity when they set up WHfB.
WHfB and password changes
The WHfB PIN or biometric gesture you establish at enrollment is specific to that device. You can, however, set up WHfB for the same account on multiple devices. If WHfB is not deployed and the password for that account changes, you must provide the new password on each device to continue WHfB use.
Example 1
Let’s suppose you have set up a PIN for your Microsoft account on Device A. You use your PIN to sign in on Device A and then change the password for your Microsoft account. Since you were using Device A when you changed your password, the PIN on Device A will continue to work with no other action on your part.
Example 2
Suppose you sign in on Device B and change your password for your Microsoft account. The next time that you try to sign in on Device A using your PIN, sign-in will fail because the Device A account credentials will be outdated.
How to update WHfB after you change your password on another device
- When you try to sign in using your PIN or biometric, you’ll see the following message: Your password was changed on a different device. You must sign in to this device once with your new password; then you can sign in with your PIN.
- Select OK.
- Select Sign-in options.
- Select Password.
- Sign in with new password.
- The next time that you sign in, you can select Sign-in options > PIN to resume using your PIN.
WHfB policy configuration
Windows Hello for Business can be enabled multiple ways through Microsoft Intune. The first method is through Windows Device Enrollment. This method can be used for devices that are Microsoft Entra joined but have not yet enrolled in Intune. The second method, Device Configuration Profile, is used for devices already enrolled in Intune.
WHfB device enrollment configuration steps
-
Open Microsoft Intune Admin Center. At the time of this writing, the URLs provided are correct. (In late 2023, the Intune Admin Center URL will be https://intune.microsoft.com. Microsoft is already making this change, so organizations can use both of the following URLs to access the Microsoft Intune Admin Center.)
a. For commercial tenants, the URLs are:
b. For Microsoft 365 Government Community Cloud High (GCC High) tenants, the URLs are
-
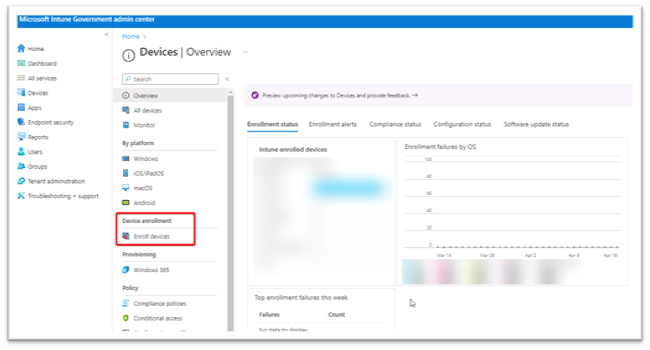
From the Devices | Overview page, select Enroll devices from the middle navigation pane.
Figure 2 provides a screenshot of the Intune Devices Overview page displaying the locale of Enroll devices. Figure 2: Intune Devices | Overview Page
-
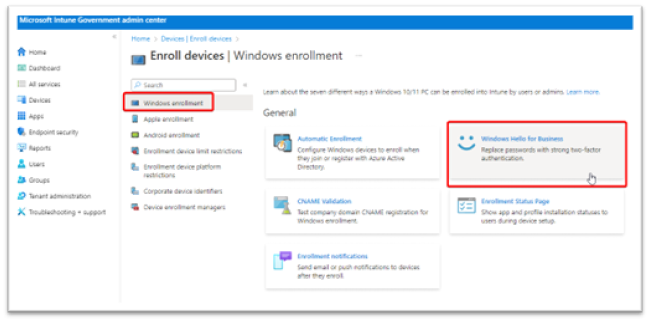
By default, Windows enrollment is preselected on the Enroll devices page. Choose the button named Windows Hello for Business. Figure 3 displays the Intune Windows enrollment page.
Figure 3: Intune Windows Enrollment Page
-
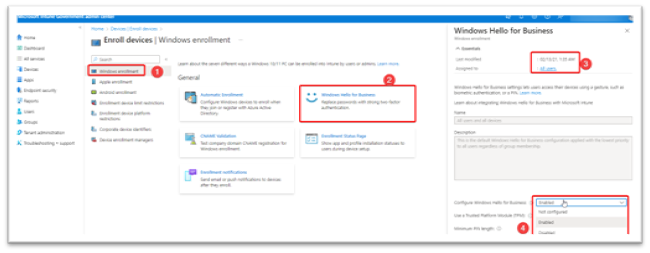
A new blade appears on the right when Windows Hello for Business is selected. WHfB enrollment by default is Enabled and assigned to All users. This assignment cannot be changed and will always remain scoped to all users. In order to limit the scope of WHfB, disable this enrollment policy and instead proceed with deploying WHfB through a device configuration profile (detailed in the next section). Device configuration profiles can be assigned to user or device groups, and they can be used as a proof of concept, pilot, or gradual rollout of WHfB throughout the organization.
Settings for this policy can be Enabled, Not configured, or Disabled, as shown in Figure 4. When not configured is selected, this setting acts as Disabled.
Figure 4: Windows Hello for Business Enrollment Policy Settings
After enabling the policy, a series of policy choices must be made. Recommended settings are as follows:
-
Use a Trusted Platform Module: Required
- TPM 2.0 is required.
- This is a requirement of the Windows 10/11 Defense Information Systems Agency's Security Technical Implementation Guide (DISA STIG) baseline.
-
Minimum PIN length: 6
- This is a requirement of the Windows 10/11 DISA STIG baseline.
- Maximum PIN length: 127
- Lowercase letters in PIN: Allowed
- Uppercase letters in PIN: Allowed
-
Special characters in PIN: Allowed
- Requiring letters or special characters in a PIN may make users think it's a password rather than a PIN. They may reuse a device password from another cloud application.
- It is recommended to leave the PIN as a numeric PIN.
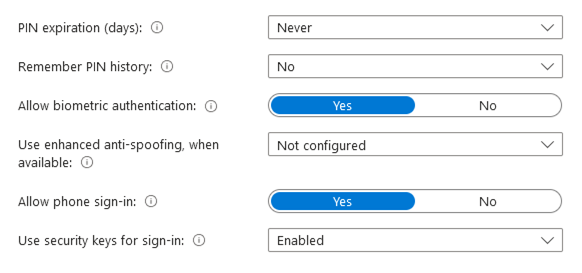
- PIN expiration (days): Never
- Remember PIN history: No
- Allow biometric authentication: Yes
-
Use enhanced anti-spoofing, when available: Yes
- This is a requirement of the Windows 10/11 DISA STIG baseline.
- This setting only applies to Intune enrolled and Microsoft Entra joined devices.
- This setting applies to biometric facial recognition.
- What is anti-spoofing for facial recognition? An attacker with physical access to a Windows 10/11 device with WHfB set as the authentication method can use an Infrared (IR) photo of the user's face, save the frames to a custom USB device, and plug the USB into the computer. This tactic bypasses the built-in camera, and WHfB will search for frames on the external USB.
- Microsoft fixed this vulnerability in Update KB 5005478 (Windows Hello CVE-2021-34466).
- Read more on the CyberArk website.
-
Allow phone sign-in: Yes
- Only applies to portable devices that are configured to accept the WHfB PIN. Bluetooth is required as is additional configuration of the Policy CSPPassportforWork.
- Use security keys for sign-in: Not configured
- Save the policy and begin enrolling devices in Intune via automatic enrollment settings.
Figures 5 and 6 depict the policy choices that must be made when a WHfB policy is enabled.
Figure 5: Windows Hello for Business Enrollment Policy Settings 1
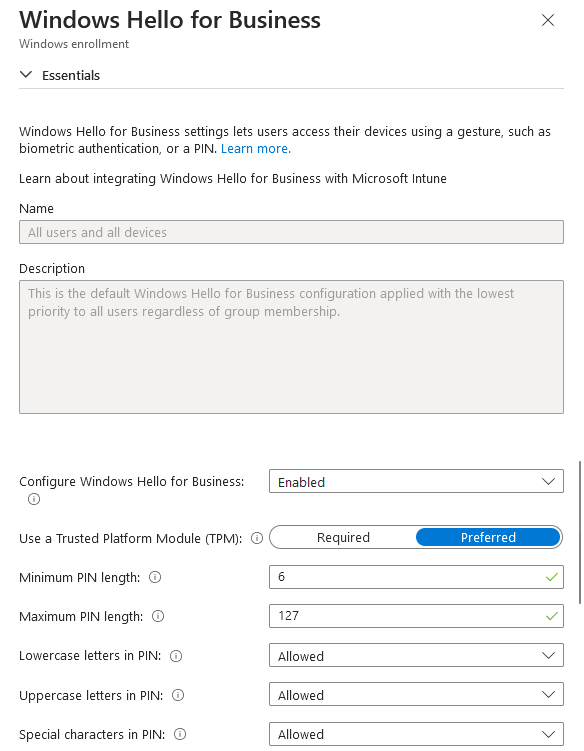
Figure 6: Windows Hello for Business Enrollment Policy Settings 2
WHfB device configuration profile steps
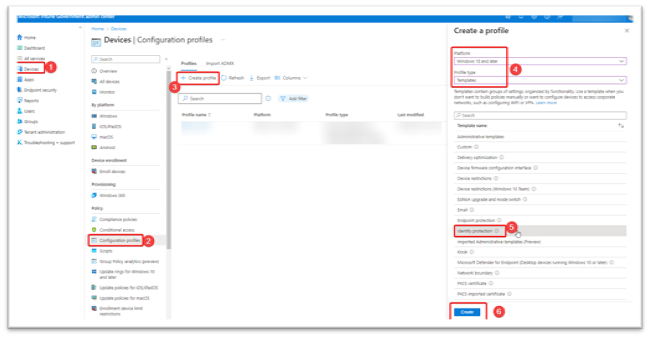
- Select Devices on the leftmost navigation pane.
- Choose Configuration profiles from the middle navigation blade.
- Select Create profile.
- Set Platform : Windows 10 and later.
- Set the Profile type : Select Templates > Identity protection.
- Select Create.
Figure 7 depicts steps 1 through 6 for creating a device configuration profile.
Figure 7: Windows Device Configuration Profile Creation
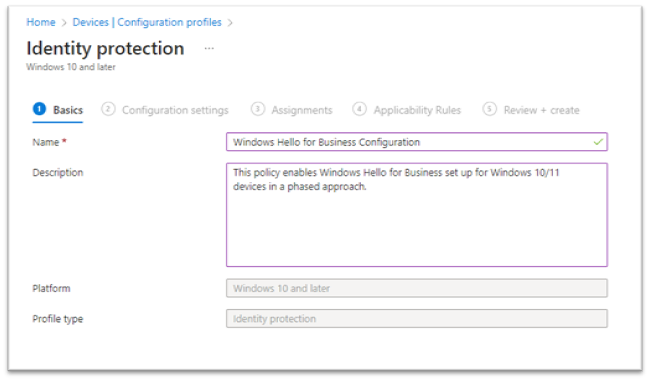
- As illustrated in Figure 8, enter the following properties in Basics :
- Enter Name : Enter a descriptive name for the new profile. Name your policies so you can easily identify them later.
- Description : Enter a description for the profile.
- Select Next to continue.
Figure 8: Windows Device Configuration Profile Name and Description
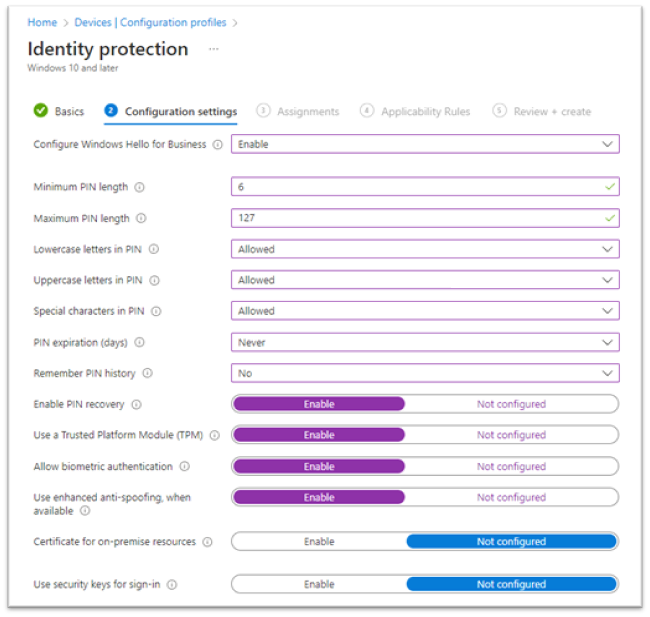
In Configuration settings (see Figure 9), configure the following settings:
- Configure Windows Hello for Business: Enabled
-
Minimum PIN length: 6
- This is a requirement of the Windows 10/11 DISA STIG baseline.
- Maximum PIN length: 127
- Lowercase letters in PIN: Allowed
- Uppercase letters in PIN: Allowed
- Special characters in PIN: Allowed
- PIN expiration (days): Never
- Remember PIN history: No
- Enable PIN recovery: Enable
-
Use a Trusted Platform Module (TPM): Enable
- This is a requirement of the Windows 10/11 DISA STIG baseline.
- Allow biometric authentication: Enable
-
Use enhanced anti-spoofing, when available: Enable
- This is a requirement of the Windows 10/11 DISA STIG baseline.
- Certificate for on-premise resources: Not configured
- Use security keys for sign-in: Not configured
Select Next to continue.
Figure 9: Windows Device Configuration Policy Settings
-
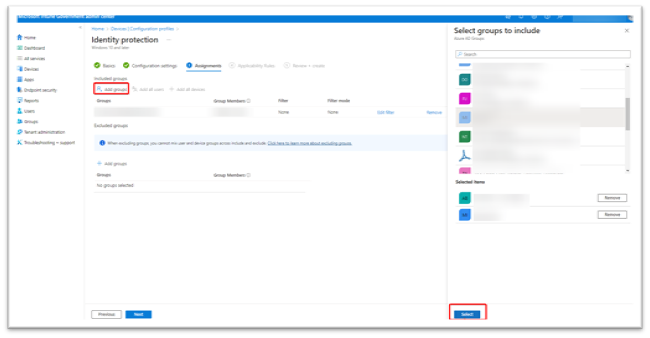
In Assignments (see Figure 10), select the user or device group(s) that will receive this profile. When the phased implementation is near completion, simplify the assignments by removing the existing user or device groups and select Add all users or Add all devices instead.
- Note: To assign multiple users to a device, specify that the WHfB policy be applied to devices. If the policy is applied to users, only one user can be provisioned to a device. If all devices will be assigned to individual users, then user groups will be sufficient.
- Under Included Groups, select the Add Groups button. A blade will appear on the right to choose one or multiple groups.
- Select your groups and click Select at the bottom. The group will appear under Included Groups.
- Repeat for Excluded Groups, specifying any groups you want to exclude from WHfB.
- Select Next to continue with Applicability Rules.
Figure 10: Windows Device Configuration Group Assignment
- In Applicability Rules (see Figure 11), use the Rule, Property, and Value options to define how this profile applies within assigned groups. Intune applies the profile to devices that meet the rules you enter.
Figure 11: Windows Device Configuration Applicability Rules
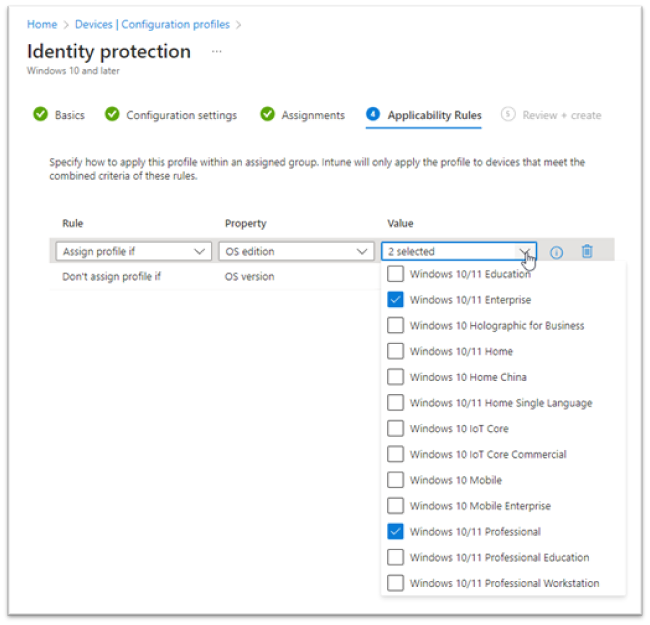
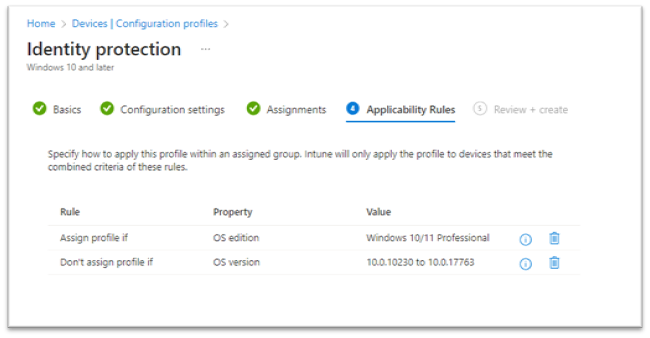
- Applicability rules for this profile are Assign profile if or Don't assign profile if (see Figure 12).
- The available properties are OS Edition (Windows 10/11 Education, Professional, Enterprise, Home, etc.).
- The OS version refers to a specific build number for Windows 10/11. For example: 10.0.10240, 10.0.19045, etc.
- Select Next.
Figure 12: Windows Device Configuration Applicability Rules Review
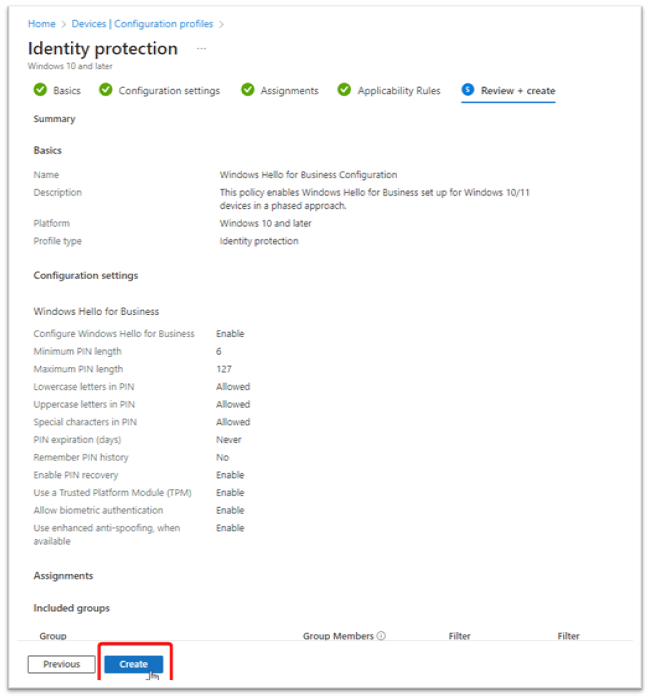
- In Review + create (see Figure 13), review your settings. Select Create to save your changes; the profile is assigned. The policy is also shown in the profiles list from step 2 in this section.
Figure 13: Windows Hello for Business Configuration Profile Completion
WHfB user experience
This section details the user experience for setting up Windows Hello for Business. The minimum device requirements for fingerprint and facial recognition sensors can be found here.
By default, users will be prompted for facial recognition and PIN creation if biometric authentication is enabled. Fingerprints can be added later from the Settings > Accounts > Sign-in options menu.
First time setup for new device/PIN creation
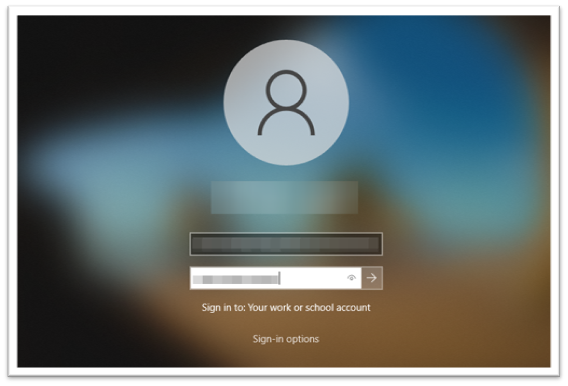
Enter the username and password for an Microsoft Entra ID user on a Windows 10 or 11 device, as shown in Figure 14.
Figure 14: Windows Sign-in
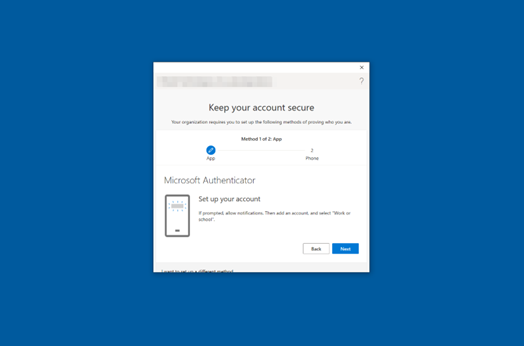
As shown in Figure 15, the user is prompted to set up WHfB.
Figure 15: Windows Hello Setup Prompt

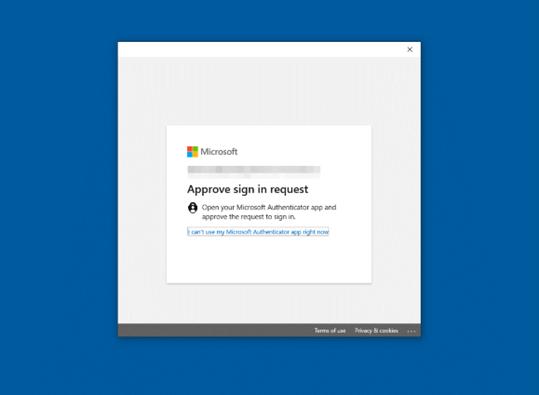
The MFA challenge only occurs on the first sign-in to Windows when setting up Windows Hello. The user will receive a push notification or number-matching prompt on the Microsoft Authenticator mobile application. By default, Windows does not offer additional MFA with the Microsoft Authenticator app on Windows Sign-ins. Figure 16 shows the Microsoft Authenticator prompt.
Figure 16: Microsoft Authenticator Request
To view Microsoft Authenticator application setup instructions, please follow this link to Windows Hello for Business – Microsoft Authenticator Setup for iOS & Android.
Based on the WHfB Enrollment or Identity Protection policy previously discussed, the PIN can be numeric or alphanumeric, with or without special characters. Figure 17 provides a screenshot of the PIN setup screen.
Figure 17: Windows PIN Creation

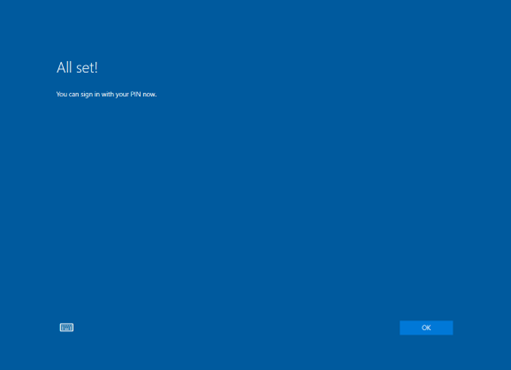
Once the PIN is successfully created, the screen shown in Figure 18 will appear.
Figure 18: Windows PIN Completion
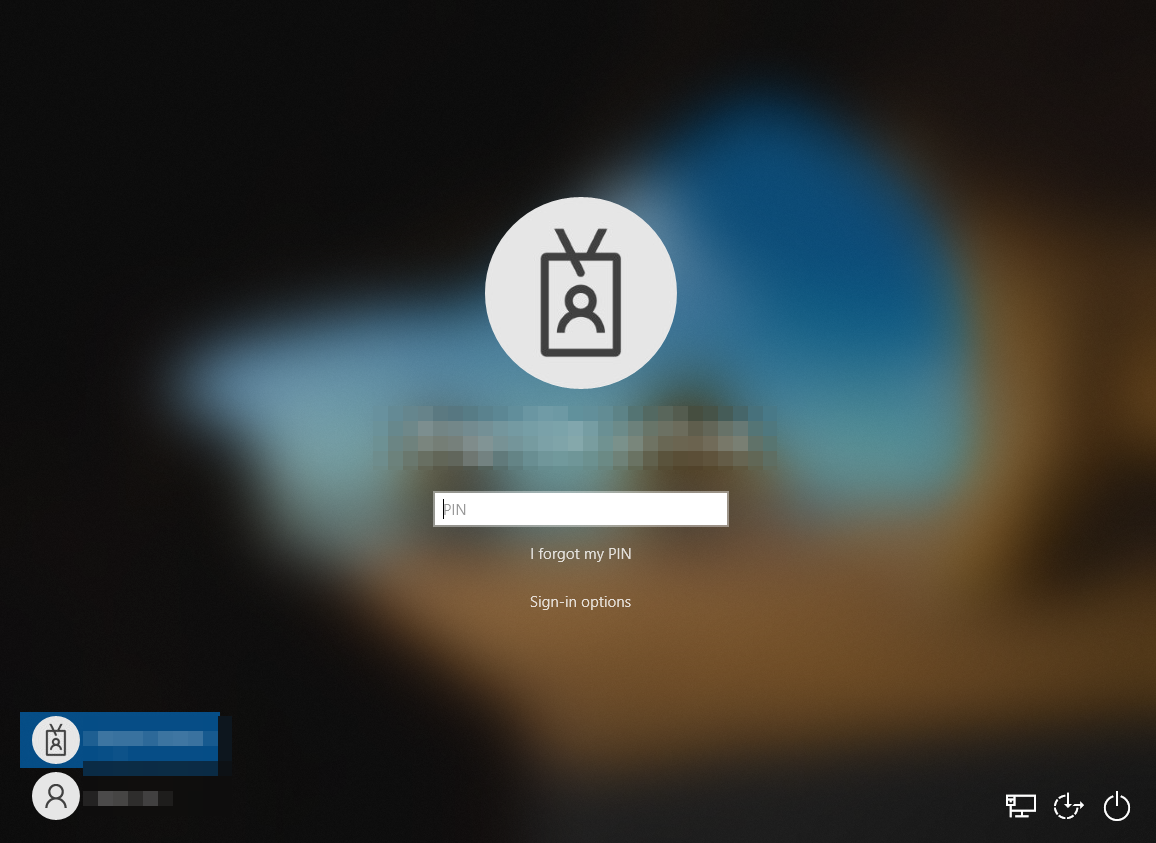
After signing out once, WHfB is configured with a PIN (minimum requirement), as shown in Figure 19.
Figure 19: Windows Sign-in with PIN
Windows Hello for Business: Microsoft Authenticator Setup for iOS and Android
iOS - Microsoft Authenticator setup
Download and install the Microsoft Authenticator app - Microsoft Support
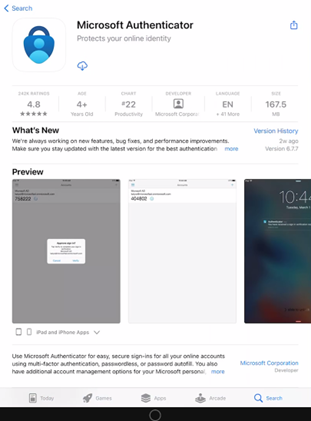
- Install the latest version of the Authenticator app for Apple iOS (see Figure 20). On your Apple iOS device, go to the App Store to download and install the Authenticator app.
Figure 20: iOS App Store Microsoft Authenticator Install
- Set up two-step verification on Authenticator. To secure your account, the Authenticator app can provide you with a code that provides additional verification. There is no need to wait for texts or calls. The following instructions ensure only you can access your information.
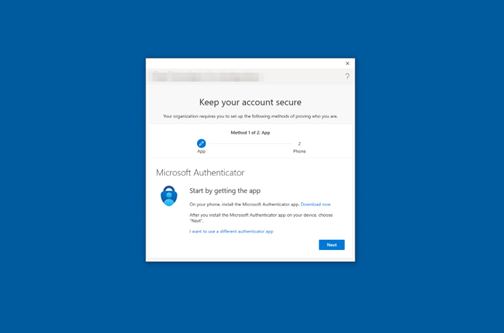
- Set up the Authenticator app (see Figure 21). After you install the Authenticator app, follow the steps below to add your account:
- Open the Authenticator app on your mobile device.
Select Next on your Windows device to begin the Microsoft Authenticator setup process.
Figure 21: Windows and Microsoft Authenticator Setup

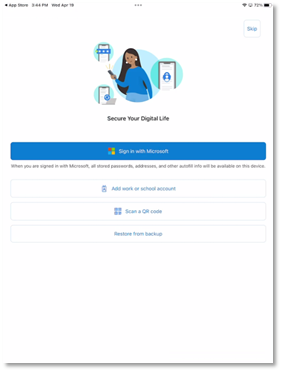
On your phone, select Work or school account , as shown in Figure 22.
Figure 22: Microsoft Authenticator Work or School Account Selection
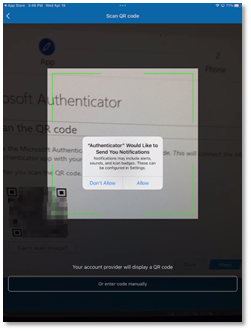
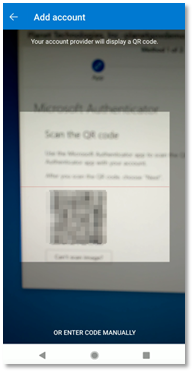
Select OK when prompted to allow the camera to scan the QR code (see Figure 23). Doing so allows the Authenticator app to access the camera on your phone to scan QR codes for account setup.
Figure 23: Microsoft Authenticator for iOS Allow Camera Access
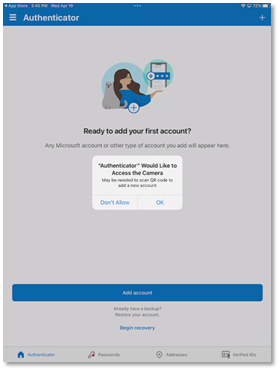
Note:
The first time you set up the Microsoft Authenticator app, you might receive a prompt asking whether to allow the app to access your camera. You must select Allow so the authenticator app can access your camera to take a picture of the QR code in the next step. If you don't allow camera access, you can still set up the Authenticator app, but you'll need to add the code information manually.
Select Next.
Figure 24: Microsoft Authenticator for iOS Account Setup
Point your camera at the QR code (see Figure 25) or follow the instructions provided in your account settings and click Next and Allow when prompted to allow the camera to scan the QR code.
Figure 25: Microsoft Authenticator for iOS Scan QR Code

Select Allow (see Figure 26) to allow notifications from the Microsoft Authenticator app.
Figure 26: Microsoft Authenticator for iOS Allow Notifications
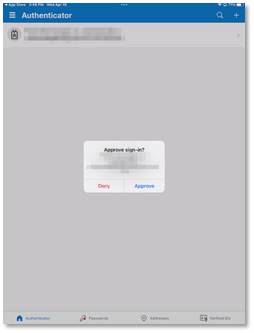
A notification will be sent to your device. Tap Approve when the notification appears, as shown in Figure 27. This process will be the means for authenticating sign-ins from now on.
Figure 27: Microsoft Authenticator for iOS Approve Sign-in
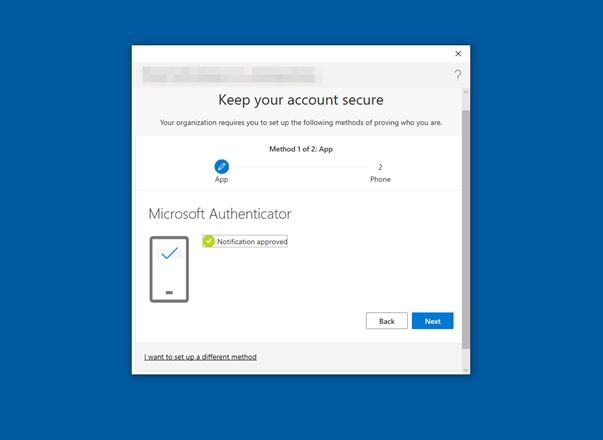
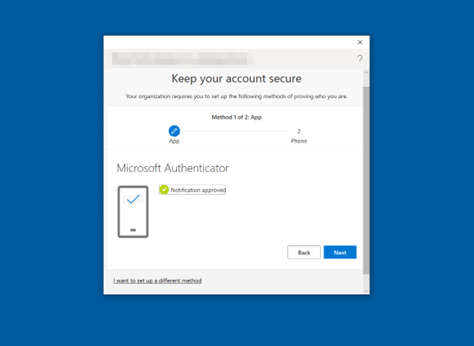
When the screen shown in Figure 28 appears on your computer, click Next.
Figure 28: Microsoft Authenticator Notification Approved
Select Next after verifying the 6-digit code, as illustrated in Figure 29.
Figure 29: Multi-Factor Authentication SMS One-time passcode

Select Next when you receive the verification message shown in Figure 30.
Figure 30: Multi-Factor Authentication SMS Completed
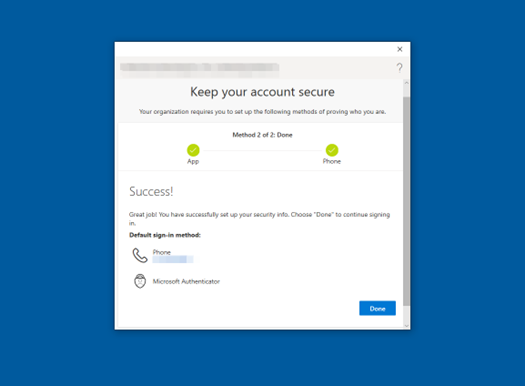
Congratulations! Multi-Factor Authentication for Windows Hello for Business is set up when the screen shown in Figure 31 appears. Select Done.
Figure 31: Multi-Factor Authentication Setup Complete
Android – Microsoft Authenticator setup
Download and install the app:
-
Install the latest version of the Authenticator app for Google Android.
Figure 32: Microsoft Authenticator for Android Account Setup
- On your Android device, go to Google Play to download and install the Authenticator app.
-
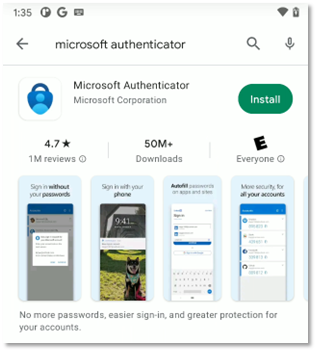
Install, download, and open the Microsoft Authenticator app from the Google Play Store (see Figure 33).
Figure 33: Google Play Store Microsoft Authenticator Install
-
Select Add account , as shown in Figure 34.
Figure 34: Microsoft Authenticator for Android Add Account
-
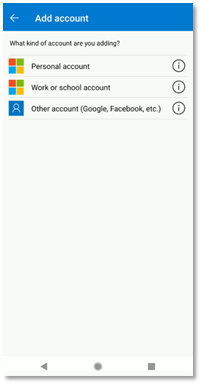
Select Work or school account (see Figure 35).
Figure 35: Microsoft Authenticator for Android Account Type Selection
-
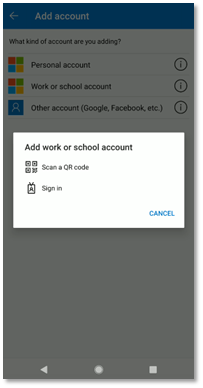
Choose Scan a QR code (see Figure 36).
Figure 36 : Microsoft Authenticator for Android Work or School Account Setup
Note : The first time you set up the Microsoft Authenticator app, you might receive a prompt asking whether to allow the app to take pictures and record video. You must select Allow so the Authenticator app can access your camera to take a picture of the QR code in the next step. If you don’t allow camera access, you can still set up the Authenticator app, but you’ll need to add the code information manually.
-
Select Next to proceed with the QR code scan (see Figure 37).
Figure 37: Microsoft Authenticator for Android Account Setup

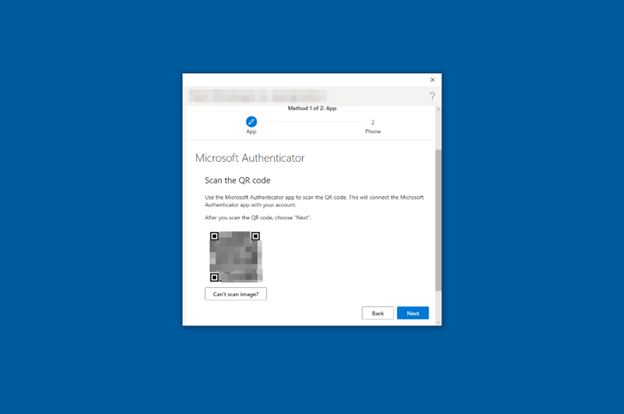
-
Microsoft Authenticator displays a QR Code (see Figure 38). Using the QR scanner on your device, scan the QR code shown. Then, click Next.
Figure 38: Microsoft Authenticator for Android QR Code Scan
-
Use the phone camera to scan the QR code, as shown in Figure 39.
Figure 39: Microsoft Authenticator for Android Scan QR Code Camera View
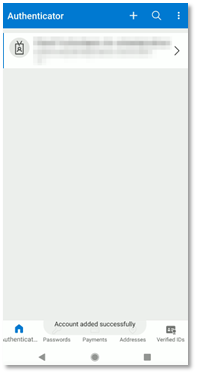
The Microsoft Authenticator app will display Account added successfully once the scan is finished, as shown in Figure 40.
Figure 40: Microsoft Authenticator for Android Account Added
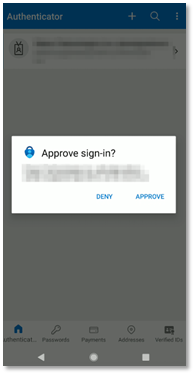
-
Respond Approve to the push notification to approve the sign-in (see Figure 41).
Figure 41: Microsoft Authenticator for Android Push Notification
-
The screen depicted in Figure 42 appears after tapping Approve on your device. Click Next on your computer.
Figure 42: Microsoft Authenticator for Android App Notification Approved
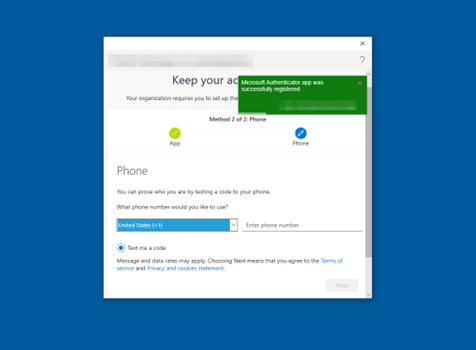
Enter a phone number when prompted to receive text message notifications to ensure your security information is up to date.
On the Phone page, type the phone number for your mobile device. Choose Text me a code. Then select Next.
-
Enter a valid phone number to configure a one-time passcode as a backup authentication method (see Figure 43). Click Next to receive a text message containing the one-time passcode.
Figure 43: Multi-Factor Authentication Phone Number Setup
-
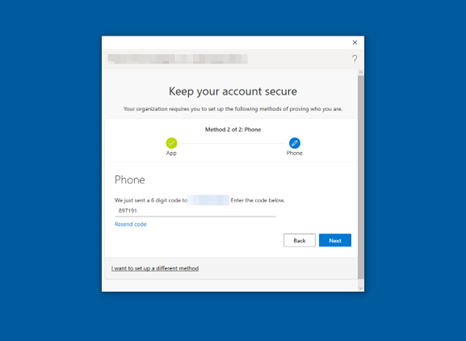
Enter the one-time passcode from the text message (illustrated in Figure 44). Then select Next.
Figure 44: Multi-Factor Authentication SMS One-Time Passcode
Your security information will now be updated and you can use text messaging to verify your identity when using two-step verification or password reset.
-
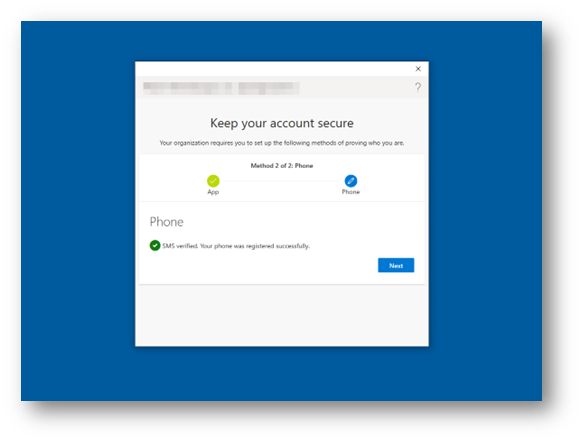
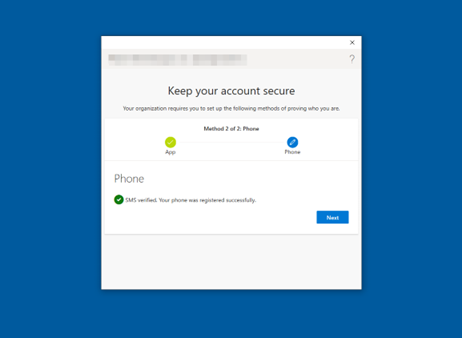
SMS verification is complete when the screen shown in Figure 45 appears. Select Next.
Figure 45: Multi-Factor Authentication SMS Complete
-
Congratulations! Multi-factor authentication has now been set up (see Figure 46). Select Done.
Figure 46: Multi-Factor Authentication Complete

Windows infrared camera biometric set-up
Facial recognition can be set up during Windows Hello enrollment or after by visiting Settings > Accounts > Sign-in options > Facial recognition. To learn more about Windows Hello facial recognition and how the infrared camera prevents spoofing.
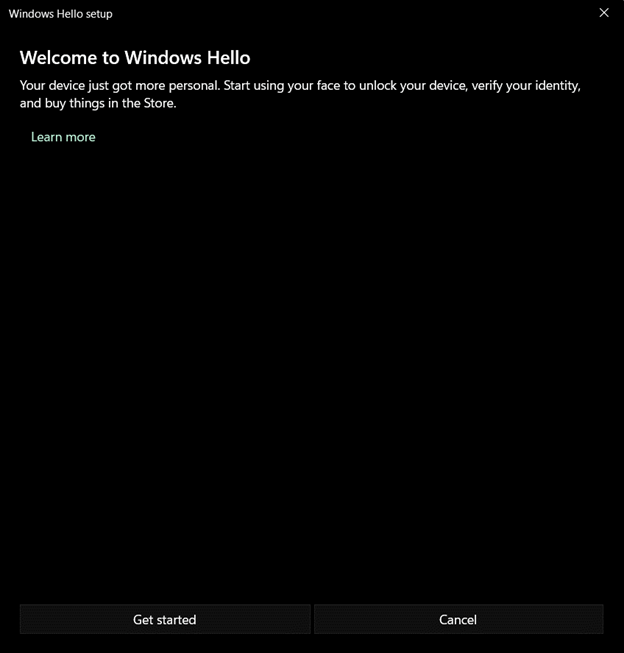
Choose Get started to begin the facial recognition process (see Figure 47).
Figure 47: Windows Hello for Business Facial Recognition Setup
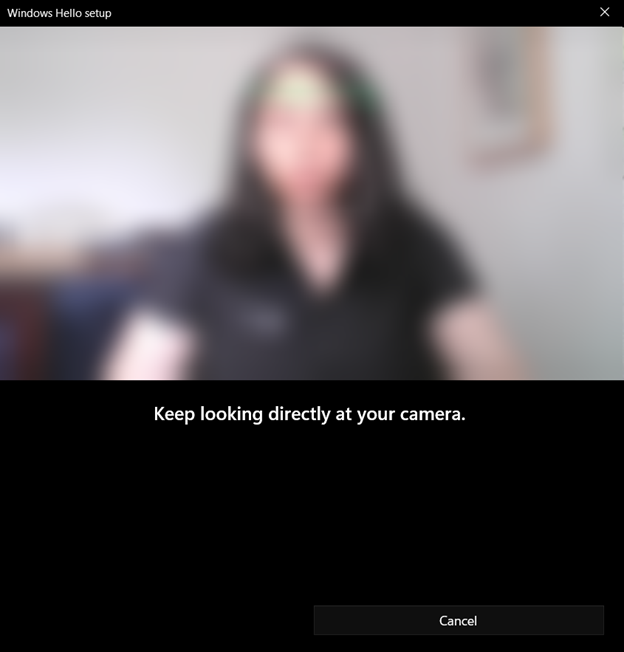
The user will receive a prompt to center their face in the camera (see Figure 48). A square will appear around the user’s face. The user must keep their eyes on the camera during this time. The square will highlight green around the perimeter of the square as Windows records and maps the user’s face.
Figure 48: Windows Hello for Business Facial Recognition Scan
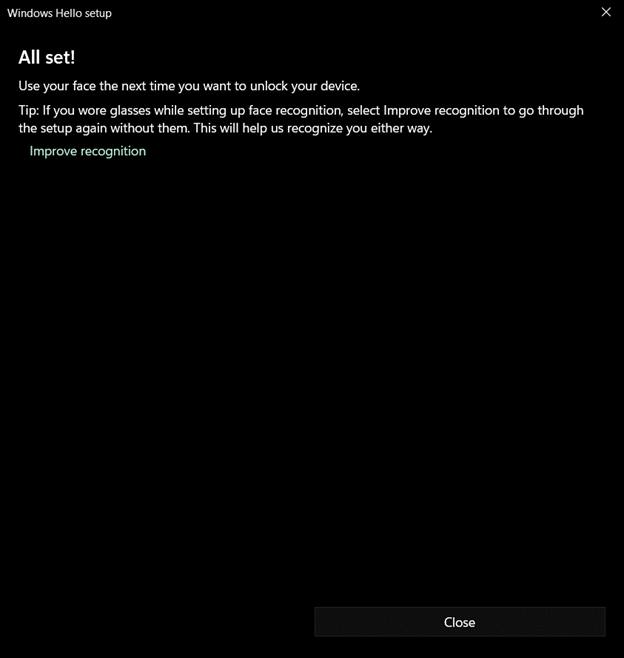
Once the facial scanning is complete, the user will be prompted to improve recognition by taking another photo with or without glasses, if they have glasses (see Figure 49).
Figure 49: Windows Hello for Business Facial Recognition Complete
Windows fingerprint biometric setup
Increasingly, device vendors are adding built-in fingerprint sensors to keyboards. Sample keyboard layouts with built-in fingerprint sensors can be found here. If a device does not have a built-in fingerprint sensor, a USB fingerprint sensor can be used with Windows Hello for Business.
Fingerprint setup can occur during Windows Hello enrollment or afterward by visiting Settings > Accounts > Sign-in options > Fingerprint recognition. Multiple fingerprints can be registered with Windows Hello.
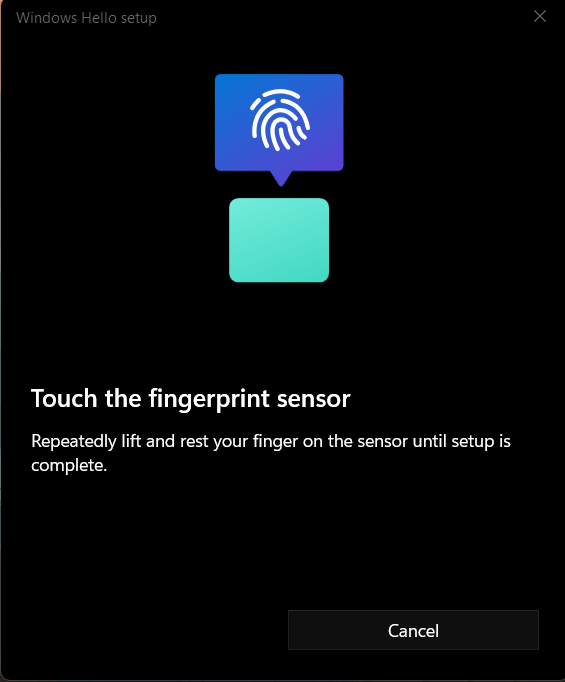
Begin by touching your thumb or another finger to the fingerprint sensor, as shown in Figure 50.
Figure 50: Windows Hello for Business Fingerprint Setup
Follow the prompts to lift your finger and touch the sensor again in order to map the entire print (see Figures 51 through 54).
Figure 51: Windows Hello for Business Fingerprint Scan 1
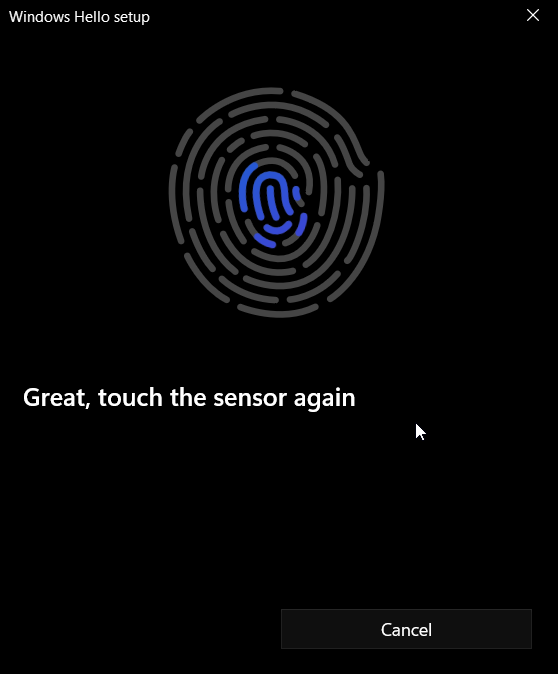
Figure 52: Windows Hello for Business Fingerprint Scan 2
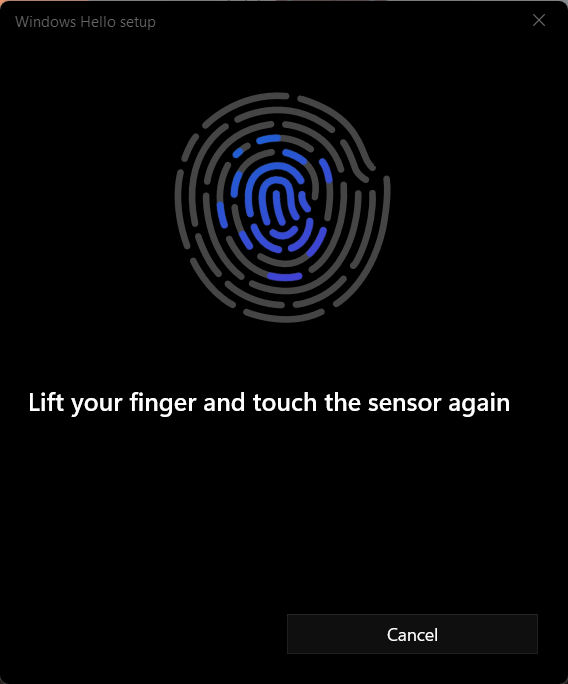
Figure 53: Windows Hello for Business Fingerprint Scan 3
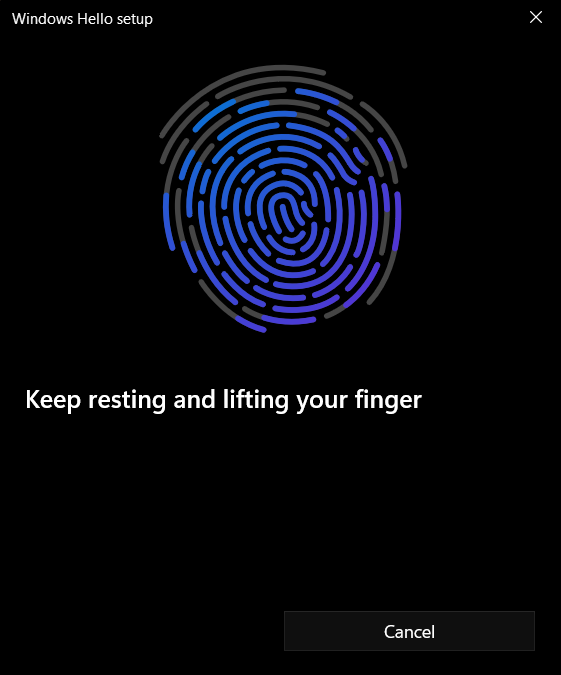
Figure 54: Windows Hello for Business Fingerprint Scan Complete
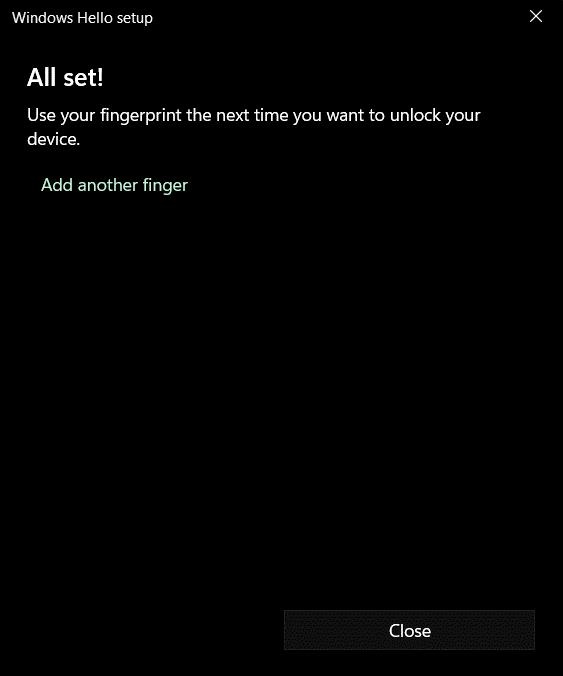
If users choose to do so, they can add multiple fingerprints for improved recognition.
Windows Hello for Business FAQs
Some of the most commonly asked questions about WHfB are presented below. A full list of common questions can be found here.
What’s the difference between Windows Hello and Windows Hello for Business?
Windows Hello represents the biometric framework provided in Windows. Windows Hello lets users use biometrics to sign in to their devices by securely storing their user name and password and releasing it for authentication when the user successfully identifies themselves using biometrics. Windows Hello for Business uses asymmetric keys protected by the device’s security module that requires a user gesture (PIN or biometrics) to authenticate.
Where is the Windows Hello biometrics data stored?
When you enroll in Windows Hello, a representation of your biometrics, called an enrollment profile, is created. More information can be found on Windows Hello face authentication. This enrollment profile biometrics data is device specific, is stored locally on the device, and does not leave the device or roam with the user. Some external fingerprint sensors store biometric data on the fingerprint module itself rather than on Windows device. Even in this case, the biometrics data is stored locally on those modules, is device specific, doesn’t roam, never leaves the module, and is never sent to Microsoft cloud or external server. For more details, see Windows Hello biometrics in the enterprise.
What happens when a user forgets their PIN?
If the user can sign in with a password, they can reset their PIN by selecting the I forgot my PIN link in the Settings app. Users can reset their PIN from the lock screen by selecting the I forgot my PIN link on the PIN credential provider.
For on-premises deployments, devices must be connected to their on-premises network (domain controllers and/or certificate authority) to reset PINs. Hybrid deployments can onboard their Azure tenant to use the Windows Hello for Business PIN reset service to reset their PINs. Non-destructive PIN reset works without access to the corporate network. Destructive PIN reset requires access to the corporate network. For more details about destructive and non-destructive PIN reset, see PIN reset. The Microsoft PIN reset service is not available for Azure Government tenants. Enabling PIN recovery is possible for Azure Government tenants by configuring allowed sign-in URLs through Microsoft Intune, Group Policy Objects or a Configuration Service Providers (CSP).
Can I disable the PIN while using Windows Hello for Business?
No. The movement away from passwords is accomplished by gradually reducing the use of the password. In situations where you can’t authenticate by using biometrics, you need a fallback mechanism that isn’t a password. The PIN is the fallback mechanism. Disabling or hiding the PIN credential provider will disable the use of biometrics.
How many users can enroll for Windows Hello for Business on a single Windows device?
The maximum number of supported enrollments on a single device is 10. This lets 10 users each enroll their face and up to 10 fingerprints. For devices with more than 10 users, or for users that sign in to many devices (for example, a support technician), the use of FIDO2 security keys is recommended.
Can I use third-party MFA providers with Windows Hello for Business?
Yes, if you’re using federated hybrid deployment, you can use any third-party that provides an AD FS MFA adapter. Here is a list of third-party MFA adapters.
Is Windows Hello for Business considered multi-factor authentication?
Windows Hello for Business is two-factor authentication based on the observed authentication factors of: something you have, something you know, and something that’s part of you. Windows Hello for Business incorporates two of these factors: something you have (the user’s private key protected by the device’s security module) and something you know (your PIN). With the proper hardware, you can enhance the user experience by introducing biometrics. By using biometrics, you can replace the something you know authentication factor with the something that is part of you factor, with the assurances that users can fall back to the something you know factor.
Can I use both a PIN and biometrics to unlock my device?
You can use multi-factor unlock to require users to provide an extra factor to unlock their device. Authentication remains two-factor, but another factor is required before Windows allows the user to reach the desktop. To learn more, see Multi-factor unlock.