
Smart Card Logon for SSH
This guide is primarily intended for network engineers and server administrators, though other types of users accessing SSH-enabled remote resources may also benefit. For network engineers, this guide will help you authenticate with your PIV/CAC credential and use SSH to access a remote Linux server from a Windows or macOS computer. For server administrators, this guide will help you configure a Linux server for remote access.
This guide uses open-source options:
- Windows: PuTTY-CAC (without Pageant) and WinSCP with Pageant
- macOS: OpenSC
Commercial solutions are also available.
SSH from Windows
Network administrator privileges are needed to use SSH for remote access.
SSH Using PuTTY-CAC
PuTTY-CAC is an open-source SSH client that integrates with Microsoft’s CryptoAPI (CAPI). The Pageant authentication client included in the software isn’t needed with PuTTY-CAC for this SSH usage. By selecting one of your personal PIV certificates for default use in this tool, the integrated CAPI “service,” ensures the SSH session can only be established after activation of the private key physically contained in the PIV card. This process ensures only the assigned PIV user, with knowledge of the PIN, can authenticate to the target via this service.
- You’ll need to download PuTTY-CAC to C:\ssh\putty.exe or a similar folder. Select either 32-bit or 64-bit, based on your Windows OS. (Pageant and MSI Installers aren’t needed.)
- Double-click on putty.exe and insert your PIV/CAC card into your card reader.
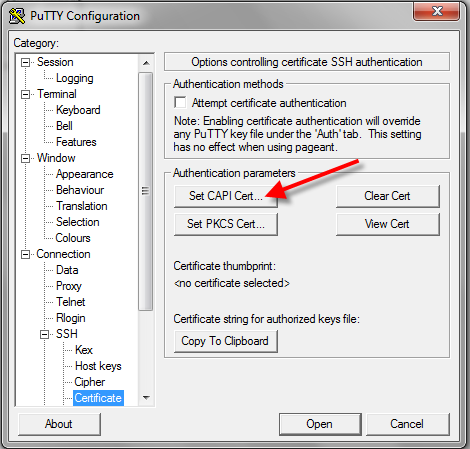
- At the PuTTY Configuration window, go to Category: > Connection > SSH > Certificate. Click the Set CAPI Cert… button and OK. This sets the default as public.
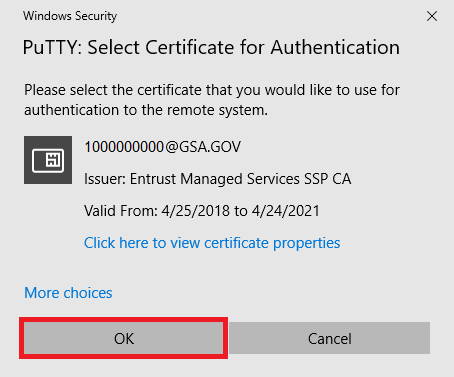
- From the Windows Security list, select your PIV/CAC authentication certificate by clicking OK. If you don’t see your certificate, click More choices. For help with certificates, see Understanding PIV Certificates.
-
Back at the PuTTY Configuration window, click the Copy to Clipboard button and paste the SSH key into a text file. (Note: PuTTY-CAC derives the SSH key from the public key of your authentication certificate.)
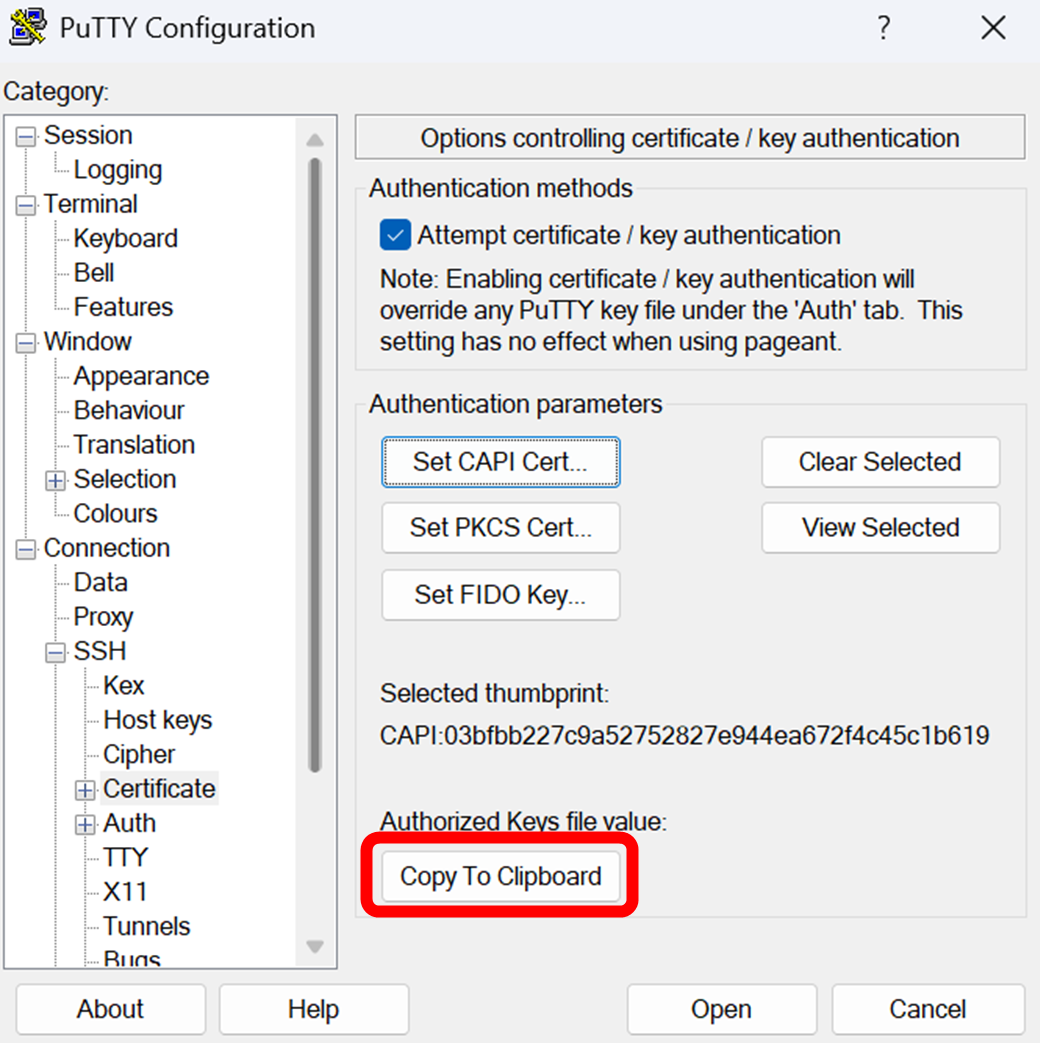
The SSH key will look like this:ssh-rsa AAAAB3NzaC1yc2EAAAADAQABAAABAQCyPn2dShOF... CAPI:05bf4653b3098a87b67816d81049f489d5b5ffb4 - Send the text file to the server administrator and request an account. (Notice that the Attempt Certificate Authentication box is now checked.) Traditionally, providing the administrator with this public key allows them to register the PIV authenticator to a pre-provisioned remote access account. Some more modern implementations may also fetch your public PIV keys from a centralized directory, making the manual registration step unnecessary.
- While waiting for an account, you can create SSH session profiles for target remote servers:
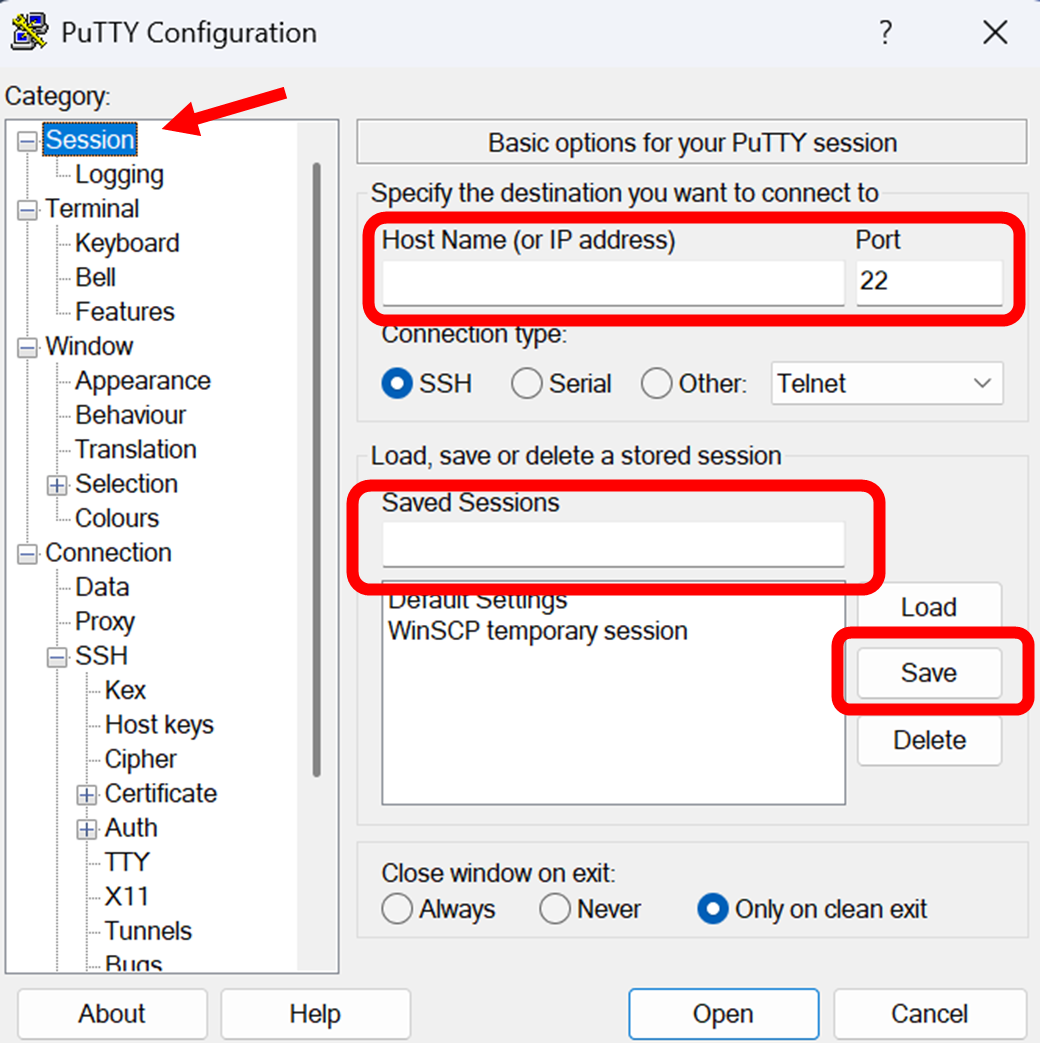
- Click Session and enter a remote server’s hostname or IP address.
- For Connection type, click SSH. (Notice that under Port, 22 appears.)
- Enter a session name in Saved Sessions and click Save.
- Click Session and enter a remote server’s hostname or IP address.
- Once you have an account, open PuTTY-CAC and insert your PIV/CAC card into your card reader.
- Click a Saved Session and Load.
- Click Open to connect to the remote server. (A dialog box displays the server’s key thumbprint.)
- Verify the server key and accept it by clicking Yes. This manual verification of the server’s host key ensures that the SSH “service” is connected to the intended target server. It provides mutual authentication as part of the protocol and helps to prevent a potential man-in-the-middle attack.
- Enter your account username. (A dialog box displays your PIV/CAC authentication certificate.)
- Click Yes to permit the signing operation and enter your PIV/CAC PIN. (You’ll then be logged into the remote server.)
The card reader may flash. Do not remove your card until you’re logged in.
SSH Using WinSCP and Pageant
WinSCP is an open-source, secure copy protocol (SCP) and secure file transfer protocol (SFTP) client. Pageant is an authentication agent that can also integrate with Microsoft’s CAPI.
Pageant Install
Pageant is included in the WinSCP installation package; however, the included version does not contain appropriate plug-ins for CAPI. You will want to download the latest release of PuTTY-CAC to ensure appropriate integration. See [PuTTY-CAC Releases."
- Download Pageant to C:\ssh\pageant.exe or a similar folder if downloaded separately.
- Download the WinSCP installer to C:\ssh\WinSCP-Setup.exe or a similar folder.
- Double-click WinSCP-Setup.exe to launch the WinSCP installer and use the recommended installation settings.
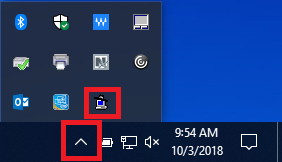
- Double-click pageant.exe to launch Pageant. Running Pageant as a background agent allows multiple applications to leverage available authenticators.
- Next, at the Windows taskbar, click the up-arrow and right-click the Pageant icon (computer wearing a Fedora).
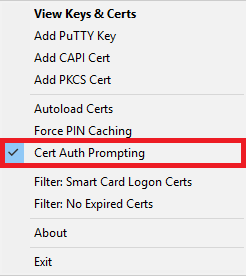
- A Pageant dialog box appears. Ensure both Remember Certs & Keys and Cert & Key Auth Prompting are enabled.
- Click Add CAPI Cert to view eligible authentication certificates.
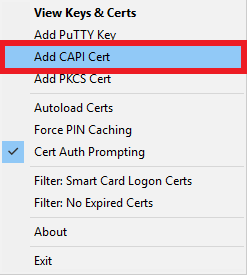
- From the Windows Security screen, select your PIV/CAC authentication certificate, and click OK. If you don’t see your certificate, click More choices. (For help with certificates, see Understanding PIV Certificates.)
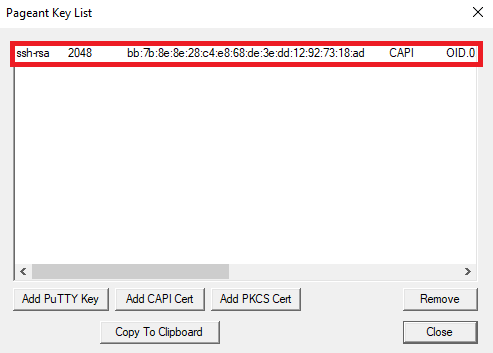
- Double-click the Pageant icon to confirm that your certificate appears on the Pageant Key List.
- The Pageant Key List shows the certificate’s SSH key attributes, such as type, size, thumbprint, etc. Click your certificate and the Copy to Clipboard button. (Note: Pageant derives the SSH key from the public key of your authentication certificate.) Close the Pageant Key List. This step automatically converts the public key in your selected PIV certificate into a consumable format.
- Paste the SSH key into a text file. It will look like this:
ssh-rsa AAAAB3NzaC1yc2EAAAADAQABAAABAQCOpGPxNh... CAPI:268f09f34ca7544bd44e1e310d2144... OID.0.9.2342.19200300.100.1.1=47999999999999 + CN=SAM JACKSON, OU=General Services Administration, O=U.S. Government, C=US - Send the text file to the server administrator and request a new account.
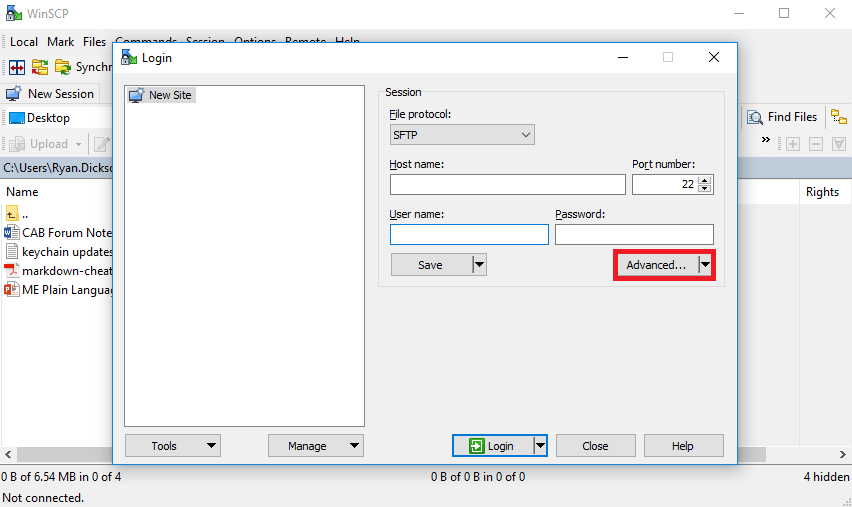
- Once you have an account, go to the WinSCP Login window. Click New Site and then the Advanced button.
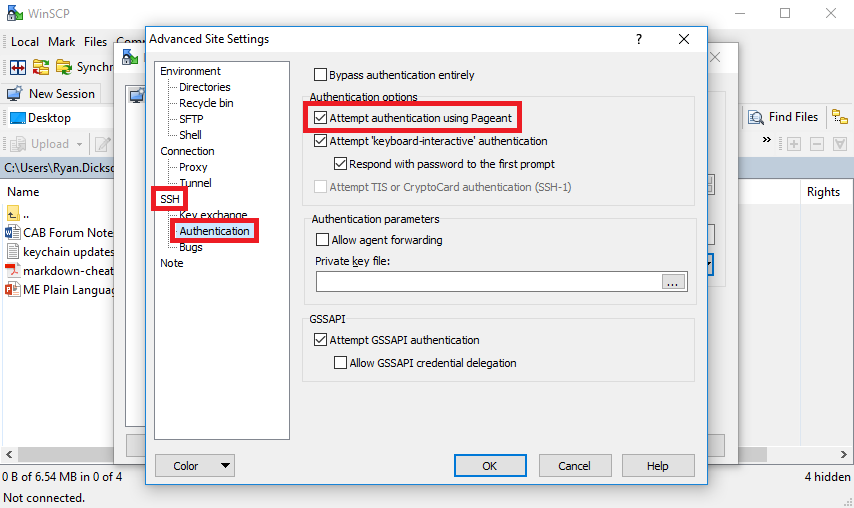
- At the Advanced Site Settings window, select SSH > Authentication. Click the checkbox for Attempt Authentication using Pageant and then click OK. (WinSCP selects additional checkboxes by default.)
- Insert your PIV/CAC card into your card reader.
- Enter the remote server’s host name and your username. Click Login.
- The Warning dialog box displays the server’s key thumbprint. Verify it and click Yes to accept.
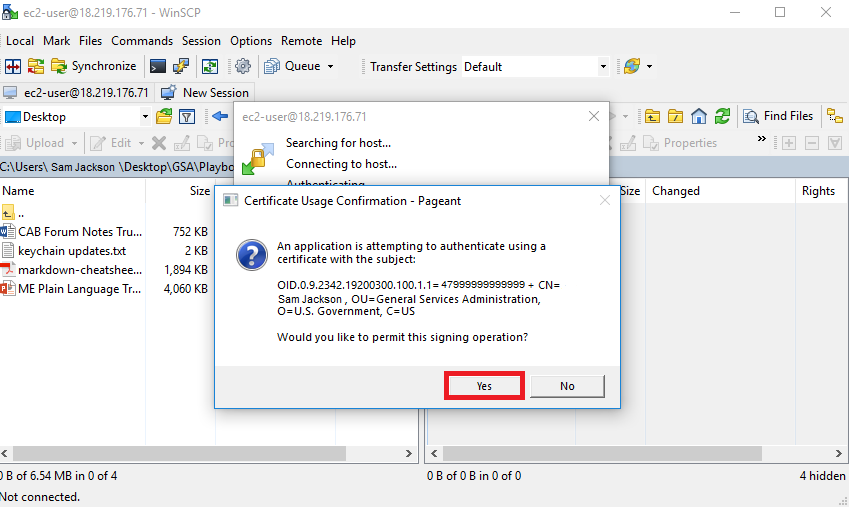
- At the Certificate Usage Confirmation - Pageant dialog box, click Yes to confirm your authentication certificate.
- When prompted, enter your PIV/CAC PIN. You’ll then be logged into the server.
The card reader may flash. Do not remove your card until you’re logged in.
SSH from macOS
Network administrator privileges are needed to use SSH for remote access.
There are two options for configuring SSH clients to use a PIV/CAC device as the SSH key store:
Built-in PIV/CAC support
Only applicable for macOS High Sierra and later.
- Insert your PIV/CAC into your card reader.
- Use ` ssh-keygen -D /usr/lib/ssh-keychain.dylib
to get the OpenSSH-format public key fingerprint which can be added to yourauthorized_keys` file, account profiles, etc. - Add
PKCS11Provider=/usr/lib/ssh-keychain.dylibto your~/.ssh/ssh_configfile to tellsshto scan the PIV profiles for keys when determining which keys to attempt on remote hosts.
See https://support.apple.com/en-us/HT208372 for additional information
OpenSC
You can use OpenSC on your macOS computer to authenticate to a remote server with your PIV/CAC card.
Use OpenSC Version Greater Than 0.20.0 to avoid Authentication Errors
If a version of OpenSC less than 0.20.0 is used, users will encounter errors when performing mTLS with servers that offer TLS 1.3. This can include browser errors like ERR_SSL_CLIENT_AUTH_SIGNATURE_FAILED. Using the most current stable release of OpenSC (0.26.1 as of January 2025) is recommended to ensure the SSH "service" remains compatible with emerging cryptographic protocols, as it leverages OpenSSL as the backbone in many of its functions."
- Install OpenSC.
- Insert your PIV/CAC into your card reader.
- To view the certificates on your Mac, enter:
pkcs15-tool --list-public-keys - Make note of the PIV AUTH pubkey ID number.
Using reader with a card: SCR35xx Smart Card Reader Public RSA Key [PIV AUTH pubkey] Object Flags : [0x0] Usage : [0xD1], encrypt, wrap, verify, verifyRecover Access Flags : [0x2], extract ModLength : 2048 Key ref : 154 (0x9A) Native : yes ID : 01 (EXAMPLE ONLY) DirectValue : <absent> - Use your PIV AUTH pubkey ID number to view your SSH key. Enter:
pkcs15-tool --read-ssh-key 01 - When prompted, enter your PIV/CAC PIN. The SSH key will look like this:
ssh-rsa AAAAB3NzaC1yc2EAAAADAQABAAABAQCyPn2dShOFLBnMraiP2MnLU .... - Copy the SSH key and paste it into a text file.
- Send the text file to the server administrator and request a new account.
- Once you have an account, you can log into the remote server. Enter:
ssh -I /usr/lib64/opensc-pkcs11.so <username>@<remote-host> - Optionally, you can update the setting in the /etc/ssh_config file to:
PKCS11Provider /usr/lib64/opensc-pkcs11.so - Enter your PIV/CAC PIN when prompted. Once it’s validated, you’ll be logged into the remote server.
The card reader may flash. Do not remove your card until you’re logged in.
Configure a Linux Server
Server administrators must have root privileges for these steps.
The following SSH configurations are examples only. Other options are available, including Pluggable Authentication Modules (PAM) that look up user accounts and authorizations through directories. You can automate account setups by using centralized configuration management tools that can push or remove authorized_keys.
By default, SSH keys are read from the .ssh/authorized_keys file in your home directory.
- You’ll need to create a /home/<username>/.ssh directory and change it to the requester’s ownership. Then, create an authorized_keys file in the .ssh directory and copy the requester’s SSH key to the /home/<user>/.ssh/authorized_keys file starting with ssh-rsa<public key><key_name>:
mkdir /home/<user>/.ssh chown <user> .ssh chgrp <user> .ssh chmod 700 .ssh cat > authorized_keys ssh-rsa AAAAB3NzaC1yc2EAAAADAQA... CAPI:05bf4653b3098a87b67816d81049f489d5b5ffb4 - Set the permissions for …authorized_keys to 600 and change the authorized_keys ownership to the user:
chmod 600 authorized_keys chown <user> authorized_keys chgrp <user> authorized_keys - You can change the location for the authorized_keys file in the /etc/ssh/sshd_config file and restart the sshd service. You can also enforce authentication with a PIV/CAC card by disabling password use:
      AuthorizedKeysFile /etc/ssh/authorized_keys/%u
      PasswordAuthentication no
Note: If you change the default settings, you’ll need to create a corresponding directory for authorized_keys under /etc/ssh and place the authorized_keys there vs. in the user’s home folder. Moving these registered public keys to a root-owned directory like /etc/ssh/authorized_keys/ prevents users from potentially bypassing security controls..
Special Thanks
Special thanks to the Department of Homeland Security, Office of the Chief Information Officer, Identity Services Branch, Information Sharing and Services Office (IS2O), for sharing its WinSCP and Pageant procedures. Collaborative efforts across the Executive Branch ensure that these technical implementation guides reflect best practices and provide a common approach to expanding the use of PIV as an authenticator.