
Enabling Enterprise Trust of the Common Policy Certificate
| Version Number | Date | Change Description |
|---|---|---|
| 1.3 | 03/06/2024 | Minor editorial updates and updated intermediate CA certificates section. |
| 1.2 | 03/06/2024 | Add Note on the difference between NTAuth and Enterprise Trust. Add note on intermittent trust issue after GPO distribution. |
| 1.1 | 08/31/2023 | Updated with Entrust rollover certificate. |
| 1.0 | 07/02/2023 | Initial draft after migration. |
This guide provides information on distributing the Federal Common Policy CA G2 (FCPCAG2) certificate to government-furnished workstations and devices as a trusted root certificate.
This guide is written for systems administrators who need to enable trust for the Federal Common Policy Root G2 (“FCPCAG2”) within their enterprise. This guide replaces the previous FCPCA migration guide since the migration to FCPCAG2 has been completed. This guide contains the portions of the previous guide that are still useful, including information about how to distribute the FCPCAG2 root certificate, and how to verify that the certificate is working as intended.
Enabling Enterprise trust of the FCPCA Root Certificate requires the following steps:
- Obtain and verify the FCPCAG2 Certificate
- Distribute the certificate to operating systems
- Verify operating system distribution
- Distribute to applications
- Distribute intermediate certificates
This guide ends by presenting answers to Frequently Asked Questions
We’re calling for all solutions! If you’d like to share your agency’s playbook on how to distribute a trusted root CA certificate to an application trust store, create an issue on GitHub or email us at fpki@gsa.gov.
Step 1 - Obtain and verify the FCPCA root certificate
The first step in this process is to obtain a copy of the FCPCAG2 root certificate and verify its authenticity.
Download a Copy of the FCPCA root certificate
To download a copy of the FCPCAG2 root certificate, use one of these recommended options:
- Download the certificate from http://repo.fpki.gov/fcpca/fcpcag2.crt
- Email fpki-help@gsa.gov to request an out-of-band copy for download.
You should never install a root certificate before you verify it. The procedures below describe how to verify the authenticity of your copy of the FCPCA root certificate. Your certificate details and hash must match the expected values in the following table.
| FCPCA | Certificate Details |
|---|---|
| Distinguished Name | cn=Federal Common Policy CA G2, ou=FPKI, o=U.S. Government, c=US |
| Serial Number | 21e5b9a0cc956de278ca012ba8fdc58a98b3fbea |
| SHA-1 Thumbprint | 99B4251E2EEE05D8292E8397A90165293D116028 |
| SHA-256 Thumbprint | 5F9AECC24616B2191372600DD80F6DD320C8CA5A0CEB7F09C985EBF0696934FC |
Verify Your Copy of the FCPCA root certificate
To verify your copy of the FCPCA root certificate, use one of these options:
On Windows: Use Microsoft Certutil
- Click Start, type cmd, and press Enter.
-
Run the following command:
certutil -hashfile {DOWNLOAD_LOCATION}\fcpcag2.crt SHA256 - Compare the output of the command to the associated thumbprint in the table above to verify you have the correct certificate.
Note: The following video shows you how to verify your copy of the FCPCA root certificate on Microsoft Server 2016. Click for a larger version
On macOS: Use Terminal
- Click the Spotlight icon and search for Terminal.
- Double-click the Terminal icon (black monitor icon with white “>_”) to open a window.
-
Run the following command:
shasum -a 256 {DOWNLOAD_LOCATION}/fcpcag2.crt - Compare the output of the command to the associated thumbprint in the table above to verify you have the correct certificate.
Note: The following video shows you how to verify your copy of the FCPCA root certificate on macOS Catalina (10.15). Click for a larger version

On Linux/Unix: Use the Command Line
- Open the command line.
-
Run the following command:
sha256sum {DOWNLOAD_LOCATION}/fcpcag2.crt - Compare the output of the command to the associated thumbprint in the table above to verify you have the correct certificate.
After you have verified the certificate, you are ready to distribute the FCPCA root certificate certificate within your environment.
- You can distribute it to operating systems in your environment or
- you can distribute it to applications within your environment.
Step 2 - Distribute to operating systems
To distribute the Federal Common Policy CA G2 (FCPCAG2) certificate, use one of these options:
For Microsoft Windows
- Use Microsoft Certutil
- Use Microsoft Group Policy Object (GPO)
- Use third-party configuration management tools
- Use Microsoft Certificate Manager for unmanaged devices
For macOS
For iOS
- Use an Apple configuration profile
- Use the Safari Web Browser
- Enable Full Trust for the FCPCA root certificate
For Linux/Unix
Microsoft Solutions
Use Microsoft Certutil
You must have Enterprise Administrator privileges for the domain to use these procedures. The commands must be run from an agency domain controller.
- Click Start, type cmd, and press Enter.
-
Run the following command:
certutil -dspublish -f [PATH\]fcpcag2.crt RootCA -
To verify that the FCPCA root certificate was distributed, run the following commands:
gpupdate /force certutil -viewstore -enterprise - Confirm that the output details include the FCPCAG2 root certificate.
- Verify the certificate details against the expected values (for example, serial number, hash, etc.).
Note: The following video shows you how to distribute the FCPCAG2 root certificate using Microsoft Certutil. Click for a larger version.
NTAuth versus Enterprise Trust
Just pushing new Federal PKI intermediates over GPO may not fix domain login. Microsoft has two primary locations to store certificates for network login and other uses: NTAuth and Enterprise Trust.
- NTAUTH is a registry location that only stores data attributes from the certificate at HKEY_LOCAL_MACHINE\Software\Microsoft\EnterpriseCertificates\NTAuth\Certificates, while Enterprise trust is a full certificate store that maintains the entire X.509 file to include the digital signature.
- The NTAuthCertificates determine which CAs are trusted for domain authentication use cases. NTAuth (or NTAuthCertificates) is not a Windows certificate store but an Active Directory object containing certificates.
- Add store is used to add a certificate to a certificate store, while publish publishes values into the directory.
- With gpupdate /force, the update starts immediately, but replication can take some time depending on the deployment's complexity (e.g., number of domain controllers or network configuration). The average default delay for gpupdate without force is around 90 minutes. This behavior occurs when Group Policy settings are updated and the client-side extension responsible for autoenrollment runs.
- The registry is not updated in specific scenarios, such as AD replication latency or when the “Do not enroll certificates automatically” policy setting is enabled. In these scenarios, run the following command manually to insert the certificate into the registry location: certutil -enterprise -addstore NTAuth issuing_ca_name.cer.
Use Microsoft Group Policy Object (GPO)
You must have Enterprise Administrator privileges for the Domain to use these procedures. The commands must be run from an agency Domain Controller.
- Navigate to Server Manager.
- Select Tools.
- Select Group Policy Management from the drop-down list.
- Right-click your desired domain(s) and select Create a GPO in this domain, and Link it here.
- Enter a GPO Name, and click OK.
- Right-click the newly created GPO and click Edit.
- Navigate to Policies > Windows Settings > Security Settings > Public Key Policies.
-
Right-click Trusted Root Certification Authorities, and select Import.
The Certificate Import Wizard appears.
- Browse to and select your copy of the FCPCAG2 root certificate.
- Verify that the target Certificate Store presents Trusted Root Certification Authorities, and select Next.
-
Select Finish to complete the import.
A success message appears.
- Close the Group Policy Management window.
- Wait for clients to consume the new policy.
-
(Optional) To force client consumption, click Start, type cmd, press Enter, and run the following command:
gpupdate /force
Note: The following video shows you how to distribute the FCPCA root certificate with Microsoft GPO. Click for a larger version.
PIV certificates appear untrusted after GPO distribution
In some environments, under some circumstances, distribution of the root by GPO can sometimes cause PIV certificates to intermittently appear to be untrusted. Microsoft has published a description of the issue and identified a workaround.
Use Third-Party Configuration Management Tools
To follow these steps, you must have Enterprise Administrator privileges for the Domain. You will need to run these commands from an agency domain controller.
You can use third-party configuration management tools, such as BigFix.
-
Using BigFix, schedule a task and push the certificate file. Run the following command (example):
certutil -f -addstore root “fcpcag2.crt”
Use Microsoft Certificate Manager for Unmanaged Devices
To distribute the FCPCAG2 root certificate to individual unmanaged devices:
- Click Start, type certmgr.msc, and press Enter.
- Right-click Trusted Root Certification Authorities, and select All Tasks > Import.
- When the Certificate Import Wizard appears, browse to and select your copy of the FCPCAG2 root certificate.
- Verify that the desired Certificate Store displays Trusted Root Certification Authorities, and select Next.
- Select Finish to complete the import.
- A success message appears.
Note: If several users share a device, you can run the certlm.msc (local machine trust store) to simultaneously update the certificate stores for all of the accounts on the device (vs. updating each account separately).
macOS Solutions
Create, Distribute, and Install an Apple Configuration Profile
For macOS and iOS government-furnished devices, you can use Apple configuration profiles (XML files) to distribute and automatically install the FCPCAG2 root certificate.
These steps describe how to create, distribute, and install profiles using Apple’s free Configurator application. There are also third-party applications available.
Only System or mobile device management (MDM) administrators should create, distribute, and install Apple configuration profiles.
Create an Apple Configuration Profile
- As an administrator, download and verify a copy of the FCPCA root certificate to your device.
- Download and install Configurator from the Apple App Store.
- Open Configurator and click File > New Profile.
- On the General tab, enter a unique profile Name (for example, FCPCA Profile) and Identifier (for example, FCPCA-0001).
- On the Certificates tab, click Configure.
- Browse to and select your verified copy of the FCPCAG2 root certificate.
- (Optional) Add additional agency-specific configurations or customizations.
- Click File > Save to save your profile to your preferred location.
- Distribute the profile across your enterprise.
Note: The following video shows you how to create an Apple configuration profile. Click for a larger version.

APPLE CONFIGURATION PROFILE (EXAMPLE)
Before using this profile, you should verify that it is suitable for your agency.
To use this profile, copy the XML information and save it as a .mobileconfig file.
<?xml version="1.0" encoding="UTF-8"?>
<!DOCTYPE plist PUBLIC "-//Apple//DTD PLIST 1.0//EN" "http://www.apple.com/DTDs/PropertyList-1.0.dtd">
<plist version="1.0">
<dict>
    <key>PayloadContent</key>
    <array>
        <dict>
            <key>PayloadCertificateFileName</key>
            <string>fcpcag2.crt</string>
            <key>PayloadContent</key>
            <data>
            MIIF3TCCA8WgAwIBAgIUIeW5oMyVbeJ4ygErqP3Fipiz++owDQYJKoZIhvcNAQEM
            BQAwXDELMAkGA1UEBhMCVVMxGDAWBgNVBAoTD1UuUy4gR292ZXJubWVudDENMAsG
            A1UECxMERlBLSTEkMCIGA1UEAxMbRmVkZXJhbCBDb21tb24gUG9saWN5IENBIEcy
            MB4XDTIwMTAxNDEzMzUxMloXDTQwMTAxNDEzMzUxMlowXDELMAkGA1UEBhMCVVMx
            GDAWBgNVBAoTD1UuUy4gR292ZXJubWVudDENMAsGA1UECxMERlBLSTEkMCIGA1UE
            AxMbRmVkZXJhbCBDb21tb24gUG9saWN5IENBIEcyMIICIjANBgkqhkiG9w0BAQEF
            AAOCAg8AMIICCgKCAgEA19fTFzEmIRgQKkFty6+99sRRjCTYBYh7LloRpCZs4rgp
            Bk+/5P4aZYd5v01GYBfOKywGJyFh4xk33/Q4yACoOT1uZOloNq/qhhT0r92UogKf
            77n5JgMhvg/bThVB3lxxahZQMM0YqUhg1rtaKRKsXm0AplhalNT6c3mA3YDSt4+7
            5i105oE3JbsFjDY5DtGMYB9JIhxobtWTSnhL5E5HzO0GVI9UvhWAPVAhxm8oT4wx
            SOIjZ/MywXflfBrDktZu1PNsJkkYJpvFgDmSFuEPzivcOrytoPiPfgXMqY/P7zO4
            opLrh2EV5yA4XYEdoyA2dVD8jmm+Lk7zgRFah/84P2guxNtWpZAtQ9Nsag4w4Emt
            Rq82JLqZQlyrMbvLvhWFecEkyfDzwGkFRIOBn1IbUfKTtN5GWpndl8HCUPbR2i7h
            pV9CFfkXTgsLGTwMNV2xPz2xThrLDu0jrDG+3/k42jB7KH3SQse72yo6MyNF46uu
            mO7vORHlhOTVkWyxotBU327XZfq3BNupUDL6+R4dUG+pQADSstRJ60gePp0IAtQS
            HZYd1iRiXKpTLl0kofB2Y3LgAFNdYmaHrbrid0dlKIs9QioDwjm+wrDLAmuT4bjL
            ZePhc3qt8ubjhZN2Naz+4YP5+nfSPPClLiyM/UT2el7eY4l6OaqXMIRfJxNIHwcC
            AwEAAaOBljCBkzAPBgNVHRMBAf8EBTADAQH/MA4GA1UdDwEB/wQEAwIBBjAdBgNV
            HQ4EFgQU9CdcqcN8R/T6pqewWZeq3TUmF+MwUQYIKwYBBQUHAQsERTBDMEEGCCsG
            AQUFBzAFhjVodHRwOi8vcmVwby5mcGtpLmdvdi9mY3BjYS9jYUNlcnRzSXNzdWVk
            QnlmY3BjYWcyLnA3YzANBgkqhkiG9w0BAQwFAAOCAgEAAWQ3MAzwzr3O1RSBkg06
            NCj7eIL7/I5fwTBLhpoMhE0XoaoPUie0gqRo3KO2MhuBtacjy55ihIY87hShGoKQ
            cbA1fh7e4Cly5QkOY+KbQsltkKzgod2zmPyC0bEOYD2LO141HyeDWdQ6dDXDz6dr
            8ObntOfMzgdo7vodCMuKU8+ysTdxRxTCi6AVz3uqe5k+ObJYpC0aXHNMy1OnFgL6
            oxMeGMlSecU/QUAIf0ncDurYFSctFwXitTC0CrcLO9/AGHqTFSHzUrIlbrgd/aGO
            +E3o3QoU+ThCPPnu1K2KZLG4pyMqdBm4y7rVGPRikLmFhIv/b6b2CL8yiYL0+mJD
            crTVs0PYfALtQxMpSA8n053gajlPwhG3O5jcL8SzqlaGPmGqpnEi9aWAYHJXTzbj
            zGUAc2u8+Kw8Xv4JffhVWIxVKH4NS5PCtgXwxifgrmPi0/uU1w0crclEsSsya7FI
            BVRTURoSwwda25wIIWPIkQsQK1snJxgEyUzXi10MUDR0WSDqQAdhbOLcmcyhED5h
            phYQnf8sD8FpoUDjoLCPkU/ytfZoplmcBM4SQ4Ejgjyk63vMqBDcCMXTHciFTsV2
            e+aReLvIvU4YmaBQQl3vCFj1qMPIkRsTby1Ff8hRDQG3kH0vefcVtcicsdU8kV2M
            ee/xJ/c0cIHZWMw0HoRZPbo=
            </data>
            <key>PayloadDescription</key>
            <string>Adds a CA root certificate</string>
            <key>PayloadDisplayName</key>
            <string>Federal Common Policy CA</string>
            <key>PayloadIdentifier</key>
            <string>com.apple.security.root.1EB75E7D-C3BC-46C2-AF42-51D80A2E12FC</string>
            <key>PayloadType</key>
            <string>com.apple.security.root</string>
            <key>PayloadUUID</key>
            <string>1EB75E7D-C3BC-46C2-AF42-51D80A2E12FC</string>
            <key>PayloadVersion</key>
            <integer>1</integer>
        </dict>
    </array>
    <key>PayloadDisplayName</key>
    <string>Federal Common Policy Certification Authority Profile</string>
    <key>PayloadIdentifier</key>
    <string>FCPCA-0001</string>
    <key>PayloadRemovalDisallowed</key>
    <false/>
    <key>PayloadType</key>
    <string>Configuration</string>
    <key>PayloadUUID</key>
    <string>AAD17D9A-DA41-4197-9F0F-3C3C6B4512F9</string>
    <key>PayloadVersion</key>
    <integer>1</integer>
</dict>
</plist>
Distribute an Apple Configuration Profile
Only System or MDM Administrators should use these steps. You should never email an Apple configuration profile to someone outside your agency’s domain.
You can use Apple’s Configurator to distribute your Apple configuration profile to government-furnished macOS and iOS devices in the following ways:
- Physically connect to the user’s device.
- Email a profile to specific users.*
- Share a profile on an agency intranet webpage.*
- Share via over-the-air profile delivery and configuration (Apple Developer Library).
- Share via over-the-air delivery and configuration from an MDM server (Apple Developer Library). Third-party applications are also available.
*For iOS only – If you download and install the FCPCAG2 root certificate from an email or an intranet website, you will need to manually enable SSL trust for FCPCA. This is not needed if you use Configurator with over-the-air (OTA) methods or an MDM enrollment profile to install the FCPCAG2 root certificate. (See Enable Full Trust for FCPCA.)
Install an Apple Configuration Profile
We recommend using an automated method to install Apple configuration profiles on government-furnished Apple devices (for example, a desktop configuration management or MDM tool), which will distribute FCPCA. (If you have questions about third-party products, email us at fpki@gsa.gov.)
You can also manually install a profile.
Note:The following video shows you how to manually install an Apple configuration profile on macOS.

Install FCPCA Using Command Line
These steps describe how to install the FCPCA root certificate in the System Keychain. You must have system administrator privileges to perform these steps.
- Click the Spotlight icon and search for Terminal.
- Double-click the Terminal icon (black monitor icon with white “>_”) to open a window.
-
Run the following command:
sudo security add-trusted-cert -d -r trustRoot -k "/Library/Keychains/System.keychain" {DOWNLOAD_LOCATION}/fcpcag2.crt
Note:The following video shows you how to install FCPCA using the command line. Click for a larger version

Install FCPCA Using Apple Keychain Access
You can use the System Keychain or Login Keychain to install the FCPCA root certificate.
System Keychain
These steps describe how to install FCPCA in the System Keychain. You must have system administrator privileges to perform these steps.
- Click the Spotlight icon and search for Keychain Access.
- Double-click the Keychain Access icon to open the application.
- Click the System keychain from the left-hand navigation.
- Click File -> Import Items
- Browse to and select your verified copy of FCPCAG2.
- When prompted, enter your administrator username and password.
- Keychain Access will present the installed certificate.
Note:The following video shows administrators how to install FCPCAG2 by using the Apple Keychain Access import process. Click for a larger version

Login Keychain
These steps describe how to install FCPCA in the Login Keychain. Both system administrators and non-administrators can perform these steps.
- Browse to your downloaded, verified copy of FCPCA.
- Double-click the file.
- Keychain Access opens and displays the installed certificate.
Note: The following video shows non-administrators how to install FCPCA using the Apple Keychain Access import process. Click for a larger version

iOS Solutions
Install FCPCA Using an Apple Configuration Profile in iOS
You can use Apple configuration profiles to install the FCPCA root certificate on both macOS and iOS devices.
Review the Apple configuration profiles guidance for instructions.
Install FCPCA Using Safari Web Browser
You can use the Safari web browser to install the FCPCA root certificate on iOS devices only.
These steps describe how to install the FCPCA root certificate as a trusted root certificate. Both system administrators and non-administrators can perform these steps.
- Launch Safari.
- Navigate to the FCPCA root CA certificate: http://repo.fpki.gov/fcpca/fcpcag2.crt.
- System message says: The website is trying to open Settings to show you a configuration profile. Do you want to allow this?
- Click Allow. The FCPCA root certificate configuration profile appears.
- Click More Details, and then select the FCPCA certificate entry.
- Scroll to Fingerprints and verify the certificate’s SHA-256 hash against the expected value.
- At the top left of screen, click Back and Install Profile. Then, click Install (top right).
- When prompted, enter your device passcode.
- Click Install in the upper right corner, and Install again.
- Click Done.
- Follow the steps below to enable full trust for FCPCA.
Note:The following video shows you how to install FCPCA using the Safari web browser. Click for a larger version

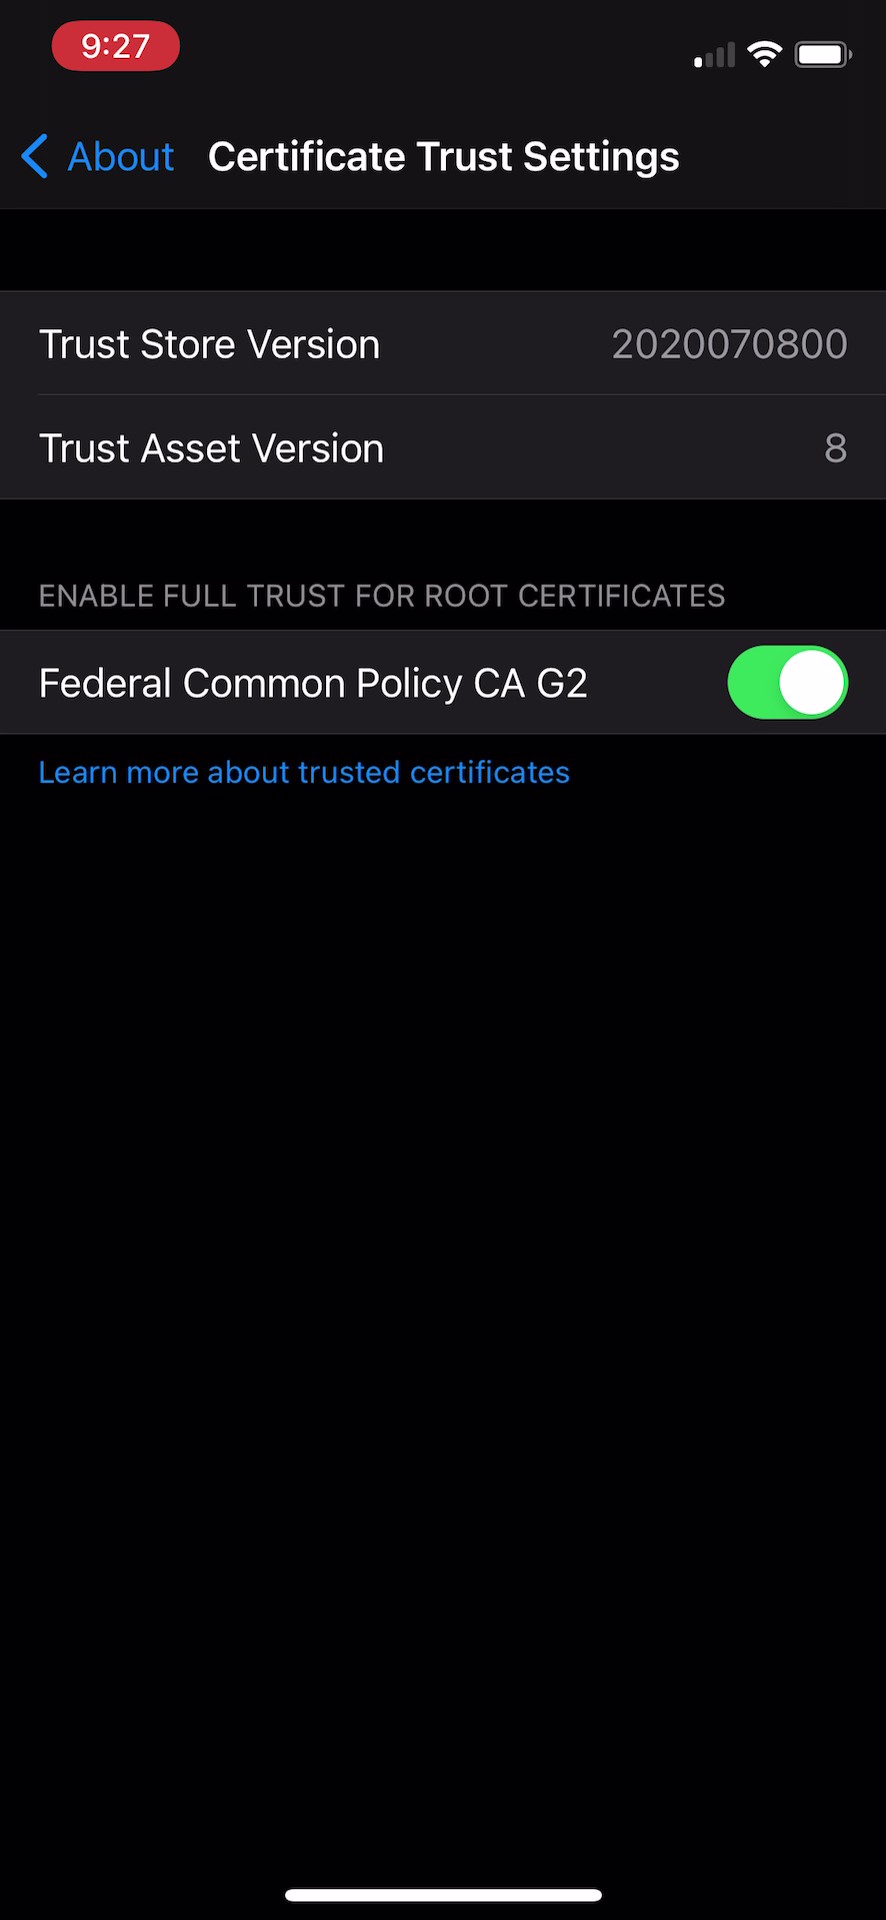
Enable Full Trust for FCPCA
This option works for iOS devices only.
These steps describe how to enable “full trust” for certificates that chain to FCPCAG2. Both system administrators and non-administrators can perform these steps.
- On the iOS device’s Home screen, select Settings > General > About > Certificate Trust Settings.
- Under Enable Full Trust for Root Certificates, toggle ON for the FCPCA root CA certificate entry.
- When the certificate appears, click Continue.
You can now successfully navigate to any intranet website whose SSL certificate was issued by a Federal Public Key Infrastructure (FPKI) CA.
Linux and Unix Solutions
Debian-Based Kernels
-
Launch the command line.
-
Change directory with the following command:
cd /usr/local/share/ca-certificates/ -
Convert the FCPCA certificate to PEM and set permissions with the following commands:
sudo openssl x509 -inform der -in [PATH\]fcpcag2.crt -out fcpcag2-pem.crt sudo chmod 644 fcpcag2-pem.crt -
Update Trusted Certificates with the following command:
sudo update-ca-certificates
Red Hat Enterprise Linux, CentOS, and Other Non-Debian-Based Kernels
-
Launch the command line.
-
Change directory with the following command:
cd /etc/pki/ca-trust/source/anchors/ -
Copy your verified copy of FCPCAG2 into the folder and set permissions with the following commands:
sudo cp [PATH\]fcpcag2.crt . sudo chown root.root fcpcag2.crt sudo chmod 644 fcpcag2.crt -
Update Trusted Certificates with the following command:
sudo /bin/update-ca-trust extract
Next, verify distribution of the FCPCAG2 certificate as an operating system trusted root.
Step 3 - Verify operating system distribution
To verify that the Federal Common Policy CA G2 (FCPCAG2) certificate has been distributed to your agency’s workstations and devices, use one of these options:
Verifying - Microsoft Windows
- Automated Solutions (Recommended)
- Manual Solutions
macOS
iOS
Linux/Unix
Verifying on Microsoft Windows
Use BigFix
- Download the BigFix Enterprise Suite (.bes) analysis file: FPKIRootG2Detection.bes.
-
Use Certutil or another tool to verify the .bes file’s SHA-256 hash (required):
certutil -hashfile [DOWNLOAD_LOCATION]\FPKIRootDetection.bes SHA256 -
The file’s hash must match this one:
03bca16f7d21be344d954105b5ccb3caf578588cf6b8bd6f1cd03dfe298361bb - Log into BigFix:Start > IBM BigFix > IBM BigFix Console.
- Import the FPKIRootG2Detection.bes file:File > Import > Open. The Create Analysis window appears.
- Assign the file:for Create in site, select site name, and for Create in domain, select domain name. Click Okay.
- On the left side panel, click Analyses to see a list of imported analysis files.
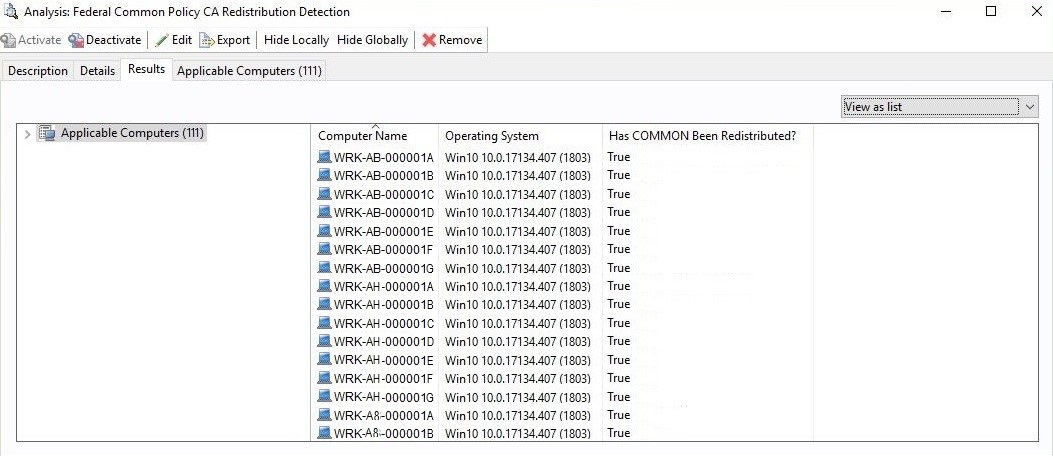
- Click Federal Common Policy CA Distribution Detection (i.e., FPKIRootG2Detection.bes) and click the Results tab to see the distribution analysis. If the analysis was not activated by default, right-click the file and then click Activate Globally.
- For each workstation or device listed, “Has FCPCA Been Distributed?” should say True. If False, you’ll need to investigate the cause of the failure. If you can’t find a cause, please contact us at fpkirootupdate@gsa.gov.
Use LANDesk 2016
- Open LANDesk 2016:Start > LANDesk Management > Desktop Manager.
- Create a custom registry data item:Tools > Reporting/Monitoring > Manage software list.
- Expand Custom Data, and click Registry items.
- Click Add to add a new registry item.
-
Add the data shown below for Windows 32-bit or 64-bit versions, based on GPO or Certutil distribution of FCPCA.
-
Microsoft Windows 32-bit Versions
- GPO Distribution
Root Key: HKLM Key: SOFTWARE\Policies\Microsoft\SystemCertificates\Root\Certificates\99b4251e2eee05d8292e8397a90165293d116028 Value: BLOB Attribute Name: Custom Data – FCPCAWin32 GPO – Certificate- Certutil Distribution
Root Key: HKLM Key: SOFTWARE\Microsoft\EnterpriseCertificates\Root\Certificates\99b4251e2eee05d8292e8397a90165293d116028 Value: BLOB Attribute Name: Custom Data – FCPCAWin32 certutil – Certificate -
Microsoft Windows 64-bit Versions
- GPO Distribution
Root Key: HKLM Key: SOFTWARE\WOW6432Node\Policies\Microsoft\SystemCertificates\Root\Certificates\99b4251e2eee05d8292e8397a90165293d116028 Value: BLOB Attribute Name: Custom Data – FCPCAWin64 GPO - Certificate- Certutil Distribution
  Root Key: HKLM
  Key: SOFTWARE\WOW6432Node\Microsoft\EnterpriseCertificates\Root\Certificates\99b4251e2eee05d8292e8397a90165293d116028
  Value: BLOB
  Attribute Name: Custom Data – FCPCAWin64 certutil - Certificate
-
- Create a query for the registry item:on the left side panel, expand Network View, and click Queries.
- Right-click My Queries, select New Query, and enter a query name (e.g., FCPCA Verification: Win32 Machines).
- Under Machine Component, expand Computer, click Custom Data, and select the registry item.
- For Boolean, select Exists.
- For Displayed Scanned Values, click Insert and add the BLOB value from above.
- Double-click the new query name to verify FCPCA distribution. The results will be similar to these (Click for a larger version):

Use Microsoft Certificate Manager
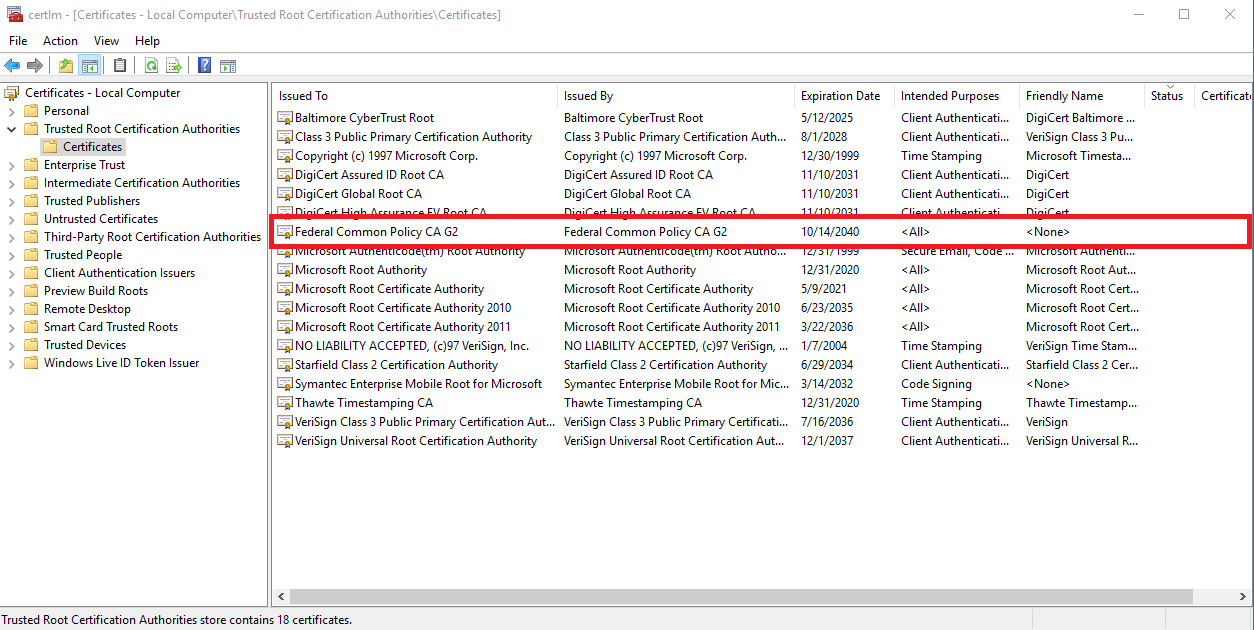
- Open Microsoft Certificate Manager:Start; then type certlm.msc and press Enter.
- Go to Trusted Root Certification Authorities > Certificates. To see whether FCPCAG2 was successfully distributed, look for Federal Common Policy CA G2 shown with Intended Purposes of ALL and a Friendly Name of None, as shown here (Click for a larger version):
Optional:
- Open Microsoft Certificate Manager: Start; then type certlm.msc and press Enter.
- Select Trusted Root Certification Authorities from the left side panel, then select View > Options.
- In the View Options box, select the Physical certificate stores checkbox.
- On the left side panel, click the > icon next to Trusted Root Certification Authorities to see the subdirectories.
- Verify the distribution of FCPCA:
- For Certutil-distributed copies of FCPCAG2, click Enterprise > Certificates. FCPCAG2 should appear in the certificates list.
- For GPO-distributed copies of FCPCA, click Group Policy > Certificates. FCPCAG2 should appear in the certificates list.
Use Microsoft Registry Editor
- Verify that FCPCAG2 has been distributed to a specific workstation or device:open the Microsoft Registry Editor:Start; type regedit.exe and press Enter.
- The following registry keys will appear for GPO- or Certutil-distributed copies of FCPCAG2:
GPO-distributed FCPCA
HKLM:\SOFTWARE\Policies\Microsoft\SystemCertificates\Root\Certificates\99b4251e2eee05d8292e8397a90165293d116028\
HKLM:\SOFTWARE\WOW6432Node\Policies\Microsoft\SystemCertificates\Root\Certificates\99b4251e2eee05d8292e8397a90165293d116028\
Certutil-distributed FCPCA
HKLM:\SOFTWARE\Microsoft\EnterpriseCertificates\Root\Certificates\99b4251e2eee05d8292e8397a90165293d116028\
HKLM:\SOFTWARE\WOW6432Node\Microsoft\EnterpriseCertificates\Root\Certificates\99b4251e2eee05d8292e8397a90165293d116028\
Verifying - macOS
Use Keychain Access
- Click the Spotlight icon and search for Keychain Access.
- Double-click the Keychain Access icon.
- Ensure that an entry for FCPCA exists in the login or System Keychain Certificates repository. Click for a larger version
Verifying - iOS
Use Settings
- Select Settings > About > Certificate Trust Settings.
- Verify that Federal Common Policy CA G2 has full trust enabled.
Verifying - Linux and Unix
Use the Command Line
-
Launch the command line.
-
Run the following command to verify the Federal Common Policy CA G2 has an entry in the system’s trust list:
trust list | grep "Federal Common Policy CA"
Next, distribute the FCPCA certificate to application trust stores.
Step 4 - Distribute to applications
Many, but not all, software applications leverage the underlying operating system trust store to verify whether a certificate should be trusted.
Collaborate across agency teams to identify applications that rely on custom trust stores to ensure distribution of the Federal Common Policy CA G2 (FCPCAG2) certificate.
Example applications with custom trust stores:
- Java and all Java-based applications (for example, Apache Tomcat)
- Mozilla products (for example, Firefox or Thunderbird)
- OpenSSL-based applications (for example, Apache HTTP Server or Nginx)
Next, determine if you need to distribute the CA certificates issued by the FCPCAG2 root certificate.
Step 5 - Distribute intermediate certificates
Depending on agency configurations, you might need to distribute these certificates to systems and applications. This page will help you understand when to distribute the intermediate CA certificates, which certificates to distribute, and recommended solutions. This page also lists intermediate CA certificate details, including download locations.
Do I Need to Distribute the Intermediate CA Certificates?
Operating Systems
You might need to distribute the intermediate CA certificates issued by the FCPCA root certificate, depending upon your enterprise operating systems’ type and configuration.
- Microsoft Windows: Intermediate CA certificate distribution is recommended.
- Typically, Windows clients are able to dynamically build paths to a trusted root CA certificate through Microsoft’s Certificate Chaining Engine (CCE).
- Distributing the intermediate CA certificates improves system performance and prioritizes use of the FCPCAG2 root certificate.
- There are instances where dynamic validation can fail, for example, when firewall rules prevent Microsoft from navigating to a certificate’s Authority Information Access extension Uniform Resource Locator. Email us at fpki@gsa.gov with any questions or issues.
-
macOS or iOS: Intermediate CA certificate distribution is required.
- Linux or Unix: Intermediate CA certificate distribution is required.
Applications
Many, but not all, software applications leverage the underlying operating system trust store to verify whether a certificate should be trusted.
Collaborate across agency teams to identify applications that rely on custom trust stores to ensure distribution of the intermediate CA certificates issued by the FCPCAG2 root certificate.
Example applications with custom trust stores that may require intermediate CA certificate installation:
- Java and all Java-based applications (for example, Apache Tomcat)
- Mozilla products (for example, Firefox or Thunderbird)
- OpenSSL-based applications (for example, Apache HTTP Server or Nginx)
Which Certificates Do I Need to Distribute?
Identify which, if any, of the intermediate CA certificates issued by the Federal Common Policy CA G2 are currently being distributed across your agency.
A recommended starting point would be to replicate the existing configuration for CA certificates issued by the Federal Common Policy CA, instead of distributing the new certificates issued by the Federal Common Policy CA G2.
If you’re not sure which intermediate CA certificates issued by the FCPCA you need to distribute, consider distributing all of them or email us for help at fpki@gsa.gov.
How Do I Distribute the Intermediate CA Certificates?
Recommended solutions for distributing intermediate CA certificates are listed below.
Use Microsoft Group Policy Object
You must have enterprise administrator privileges for the domain to use these procedures. You must run the commands from an agency domain controller.
- Navigate to Server Manager.
- Select Tools.
- Select Group Policy Management from the drop-down list.
- Right-click your desired domain(s), and select Create a GPO in this domain, and Link it here.
- Enter a GPO Name and click OK.
- Right-click the newly created GPO and click Edit.
- Navigate to Policies > Windows Settings > Security Settings > Public Key Policies.
- Right-click Intermediate Certification Authorities, and select Import.
- The Certificate Import Wizard appears
- Browse to and select the certificates issued by the FCPCA that you want to distribute.
- Verify that the target Certificate Store presents Intermediate Certification Authorities, and select Next.
- Select Finish to complete the import.
- A success message appears.
- Close the Group Policy Management window.
- Wait for clients to consume the new policy.
-
(Optional) To force client consumption, click Start, type cmd, press Enter, and run the following command:
gpupdate /force
Use Apple Configuration Profile
Only System or Mobile Device Management (MDM) Administrators should create, distribute, and install Apple configuration profiles.
Distribute Intermediate CA certificates with an Apple Configuration Profile
- As an administrator, download and verify the certificates issued by the FCPCA that you want to distribute.
- Download and install Configurator from the Apple App Store.
- Open Configurator and click File > New Profile.
- On the General tab, enter a unique profile Name (for example, FPKI Intermediate CA Certificate Distribution Profile) and Identifier (for example, FCPCA-Intermediate-0001).
- On the Certificates tab, click Configure.
- Browse to and select the certificates you want to distribute.
- (Optional) Add additional agency-specific configurations or customizations.
- Click File > Save to save your profile to your preferred location.
- Follow the steps to distribute the profile to macOS and iOS devices across your enterprise.
Note:The following video shows you how to create an Apple configuration profile. Click for a larger version
Use Linux Command Line
The steps to distribute an intermediate CA certificate are the same as the steps to distribute a root CA certificate.
Certificates Issued By the Federal Common Policy CA
The following certificates are published in the Federal Common Policy CA certificate’s Subject Information Access extension bundle located at http://repo.fpki.gov/fcpca/caCertsIssuedByfcpcag2.p7c.
- Issued to: Federal Bridge CA G4
- Issued to: U.S. Department of State AD Root CA
- Issued to: US Treasury Root CA
- Issued to: DigiCert Federal SSP Intermediate CA - G6
- Issued to: DigiCert Federal SSP Intermediate CA - G5
- Issued to: Entrust Managed PKI Federal Root CA G2
- Issued to: Entrust Managed Services Root CA
- Issued to: WidePoint ORC SSP CA 5
- Issued to: WidePoint SSP Intermediate CA
- Issued to: WidePoint SSP Intermediate CA
Important! To ensure PIV credentials are accepted by systems that are unable to perform dynamic path validation, you’ll need to distribute additional intermediate CA certificates. Learn more on our Frequently Asked Questions page.
Issued to: Federal Bridge CA G4
| Certificate Attribute | Value |
|---|---|
| Distinguished Name | CN=Federal Bridge CA G4, OU=FPKI, O=U.S. Government, C=US |
| Validity | October 15, 2020 to December 6, 2029 |
| Serial Number | 234200beaa6dada658f53b403f418295290cae82 |
| SHA-1 Thumbprint | 97db351e069964297a82040eb760c9cc1d74ba33 |
| SHA-256 Thumbprint | 74383CA1BB648F96EFE9E6ECADB5A8A359E7DF9BA262EF7C02BD004EAB3895F4 |
| Download Location | Click here |
Issued to: U.S. Department of State AD Root CA
| Certificate Attribute | Value |
|---|---|
| Distinguished Name | CN=U.S. Department of State AD Root CA, CN=AIA, CN=Public Key Services, CN=Services, CN=Configuration, DC=state, DC=sbu |
| Validity | November 8, 2023 to November 8, 2026 |
| Serial Number | 23d03cb4df4c43d5ab11ce630f41ef9d38da7fa1 |
| SHA-1 Thumbprint | b47df20b16966f65b0e4859d426d05c452b76bd6 |
| SHA-256 Thumbprint | 04aae03b527b1d3de0f3c7b53e73f196984172a33abacc7668b3c2bfb83792cf |
| Download Location | Click here |
Issued to: US Treasury Root CA
| Certificate Attribute | Value |
|---|---|
| Distinguished Name | OU=US Treasury Root CA, OU=Certification Authorities, OU=Department of the Treasury, O=U.S. Government, C=US |
| Validity | January 7, 2025 to January 7, 2028 |
| Serial Number | 26dfcc2930c52fd5d909c228dbeab3ea057b4ad7 |
| SHA-1 Thumbprint | acf3948806eda1ea966a4d484f7ce0d1b7bbce20 |
| SHA-256 Thumbprint | 3927ed6e8e16f782d8106ed877d0d14fd1173f01938369b0052d036d992c177b |
| Download Location | Click here |
Issued to: DigiCert Federal SSP Intermediate CA - G6 (Maintenance Mode)
| Certificate Attribute | Value |
|---|---|
| Distinguished Name | CN=DigiCert Federal SSP Intermediate CA - G6, O=DigiCert, Inc., C=US |
| Validity | March 16, 2022 to March 16, 2032 |
| Serial Number | 231eb3199085ee8187df5c7a598ef336b356092f |
| SHA-1 Thumbprint | 806b3aa2dbeb6a097bf07920bb77bb1eb9fbb2dd |
| SHA-256 Thumbprint | ac309ffef2da64de1a360c3194b9b78bcdb65dc4863f02c4fa2797f9d71a773b |
| Download Location | Click here |
Issued to: DigiCert Federal SSP Intermediate CA - G5 (Maintenance Mode)
| Certificate Attribute | Value |
|---|---|
| Distinguished Name | CN=DigiCert Federal SSP Intermediate CA - G5, O=DigiCert, Inc., C=US |
| Validity | November 18, 2020 to December 13, 2028 |
| Serial Number | 24bc168f9ccb30cfcef8f0a58f26f10181869266 |
| SHA-1 Thumbprint | 9aecfbe2de8aea49d220bbf799172c00527fe756 |
| SHA-256 Thumbprint | ea86e0baf55eef020ed58196af865f2fa72a77d1be70a779b65a9cbf0b5ee3f2 |
| Download Location | Click here |
Issued to: Entrust Managed PKI Federal Root CA G2
| Certificate Attribute | Value |
|---|---|
| Distinguished Name | OU=Entrust Managed PKI Federal Root CA G2, OU=Certification Authorities, O=Entrust, C=US |
| Validity | July 9, 2024 to July 9, 2034 |
| Serial Number | 29237f41950465269051730e2ac3757add090883 |
| SHA-1 Thumbprint | 437fcb8964811d84a1ab1a3c03d3ef485cb341c0 |
| SHA-256 Thumbprint | cf42c4b69d203dee12386f9fb7ffa12382f4313bd88e4debcb12852e2c78c287 |
| Download Location | Click here |
Issued to: Entrust Managed Services Root CA
| Certificate Attribute | Value |
|---|---|
| Distinguished Name | OU=Entrust Managed Services Root CA, OU=Certification Authorities, O=Entrust, C=US |
| Validity | July 13, 2026 to December 31, 2035 |
| Serial Number | 00ba204be03a22075e56051a97c24ae6f4 |
| SHA-1 Thumbprint | 88268ce81a330425f8558f5a12b398f3cf0b6dbe |
| SHA-256 Thumbprint | 91272da1cf906991388e068832f5faf236f3f7add94ed863dea831e967635cb1 |
| Download Location | Click here |
| Certificate Attribute | Value |
|---|---|
| Distinguished Name | OU=Entrust Managed Services Root CA, OU=Certification Authorities, O=Entrust, C=US |
| Validity | July 14, 2023 to December 28, 2030 |
| Serial Number | 25da3ccaaa1e16c5050feaad9e712f1b8ca90c3a |
| SHA-1 Thumbprint | d6be623683f2b47e94452c04fa1ab3ab631e83eb |
| SHA-256 Thumbprint | 34e433cdd7c647820e607d695a564bc8559ca01866633fc65b2762427a496eb3 |
| Download Location | Click here |
| Certificate Attribute | Value |
|---|---|
| Distinguished Name | OU=Entrust Managed Services Root CA, OU=Certification Authorities, O=Entrust, C=US |
| Validity | November 18, 2020 to August 14, 2029 |
| Serial Number | 215e78d99648b021c6394a6566d8e00f46a1e595 |
| SHA-1 Thumbprint | 07f5dc58f83778d5b5738a988292c00a674a0f40 |
| SHA-256 Thumbprint | e3d6b1b33d0a5df0630b32bf17f9fb632b0471a6cac561f164aa6429ef0699a1 |
| Download Location | Click here |
Issued to: WidePoint ORC SSP CA 5
| Certificate Attribute | Value |
|---|---|
| Distinguished Name | CN=WidePoint ORC SSP 5, O=ORC PKI, C=US |
| Validity | February 1, 2024 to November 5, 2030 |
| Serial Number | 2119cb5014c8049bcdb3d901c105182afdaf9e08 |
| SHA-1 Thumbprint | e4776896b9a21e65b86d07034d0e231c0bced192 |
| SHA-256 Thumbprint | 222f8115d0c91fdc6342276961bd81092f71b3a99ae30915cb5cea8576dd7f5a |
| Download Location | Click here |
Issued to: WidePoint SSP Intermediate CA
| Certificate Attribute | Value |
|---|---|
| Distinguished Name | CN=WidePoint SSP Intermediate CA, O=ORC PKI, C=US |
| Validity | April 3, 2023 to March 15, 2033 |
| Serial Number | 28f49a629440b3fdf097ac0fd46dbd9735379187 |
| SHA-1 Thumbprint | eef5180a852b044483a138bcb30ad9548463e09b |
| SHA-256 Thumbprint | edf21e73d9114477a4a4824c93414b4ec67825604575041a33ce24f0df01f66f |
| Download Location | Click here |
Issued to: WidePoint SSP Intermediate CA 2
| Certificate Attribute | Value |
|---|---|
| Distinguished Name | CN=WidePoint SSP Intermediate CA 2, O=ORC PKI, C=US |
| Validity | March 31, 2025 to February 13, 2035 |
| Serial Number | 270f14477815afa0483a3fe93e7f684082b607d9 |
| SHA-1 Thumbprint | 9ddaea4fa63e9813b04ae4918e438d69ccdfdadd |
| SHA-256 Thumbprint | 8b501cc59de687dee540b809d5ddbc9e81719d8aecf7139b21d3f4271ea82447 |
| Download Location | Click here |
Certificates issued to the Federal Common Policy CA
Distrusting the certificate below will prevent workstations from building a path from the Federal Common Policy CA, through the Federal Bridge CA G4, to the Federal Common Policy CA or any other root.
Issued by: Federal Bridge CA G4
| Certificate Attribute | Value |
|---|---|
| Distinguished Name | CN=Federal Common Policy CA, OU=FPKI, O=U.S. Government, C=US |
| Validity | October 15, 2020 to December 6, 2029 |
| Serial Number | 129217e6c9126fd816babe02d9192ae2b519e231 |
| SHA-1 Thumbprint | edf2d373f4c56b5186087300638e3c5660c9a090 |
| SHA-256 Thumbprint | 0b658c27727dfd6cd47e378ae2390ea376d9708ecf4b06775f8ee7bc50119991 |
| Download Location | Click here |
The easiest way to verify your migration to the Federal Common Policy CA G2 (FCPCAG2) is to validate one of your PIV credential certificates.
Verify Migration on Windows
- Click Start, type certmgr.msc, and then press Enter.
- Double-click Personal, and then Certificates.
- Browse to and select any of the certificates found on your PIV credential (the Issued To column displays your name).
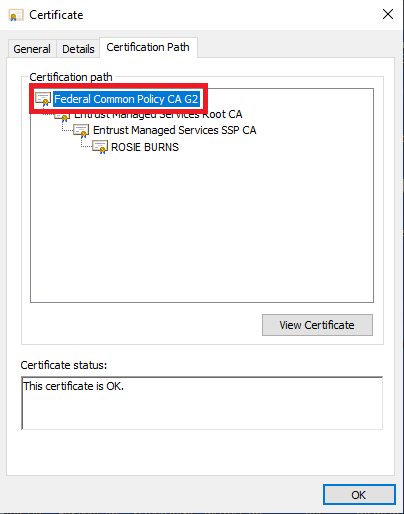
- Double-click the certificate and select the Certification Path tab.
- Verify the certificate chain begins with the FCPCA (pictured below).
Note: It’s okay if different certification authorities appear below the FCPCAG2 for your certificate. Click for a larger version
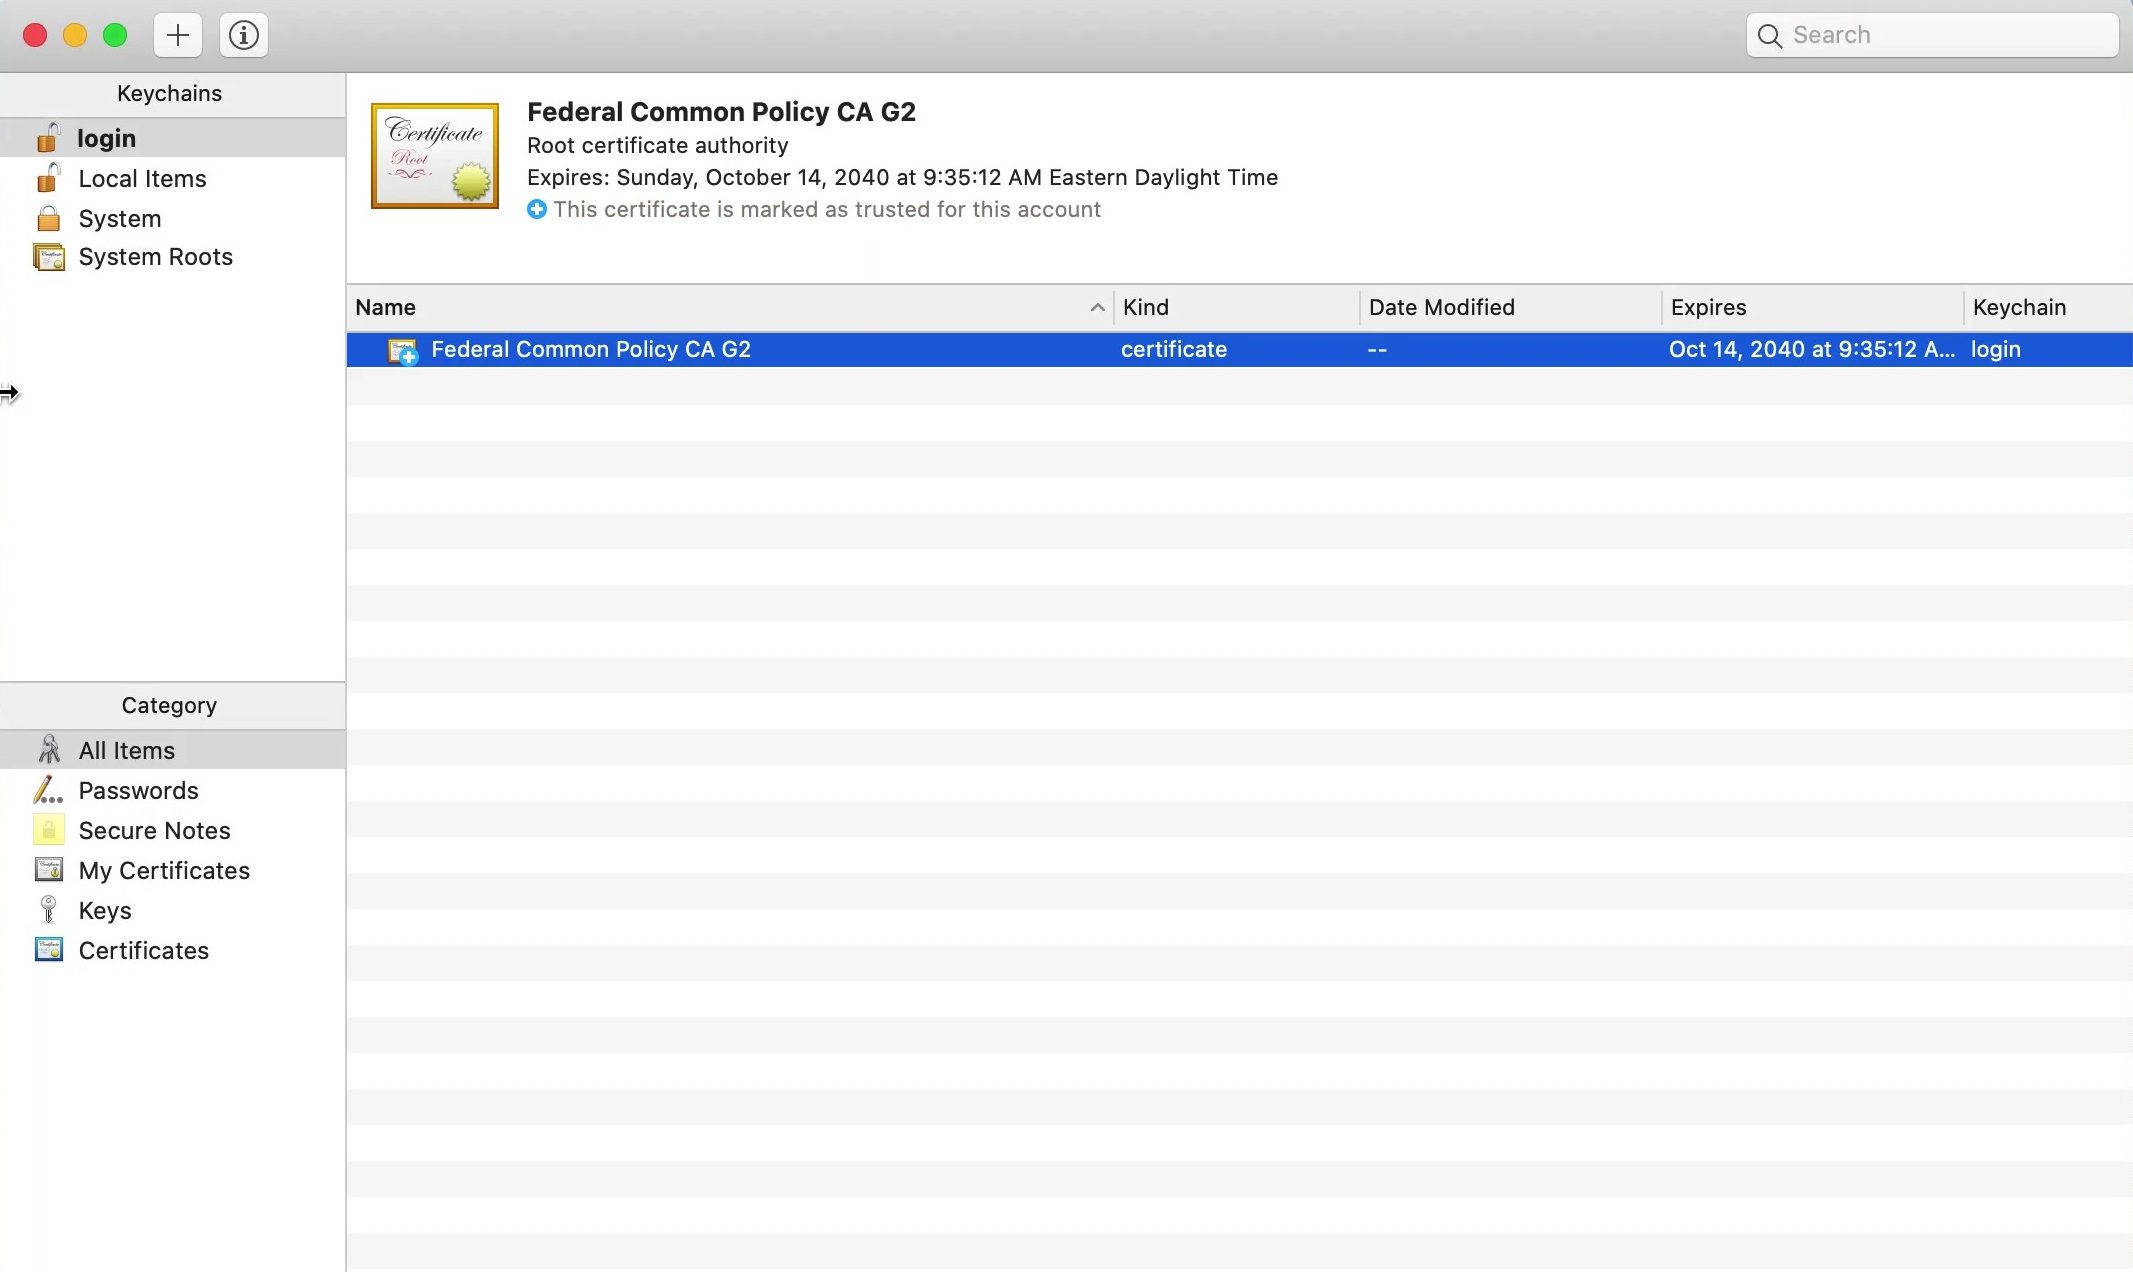
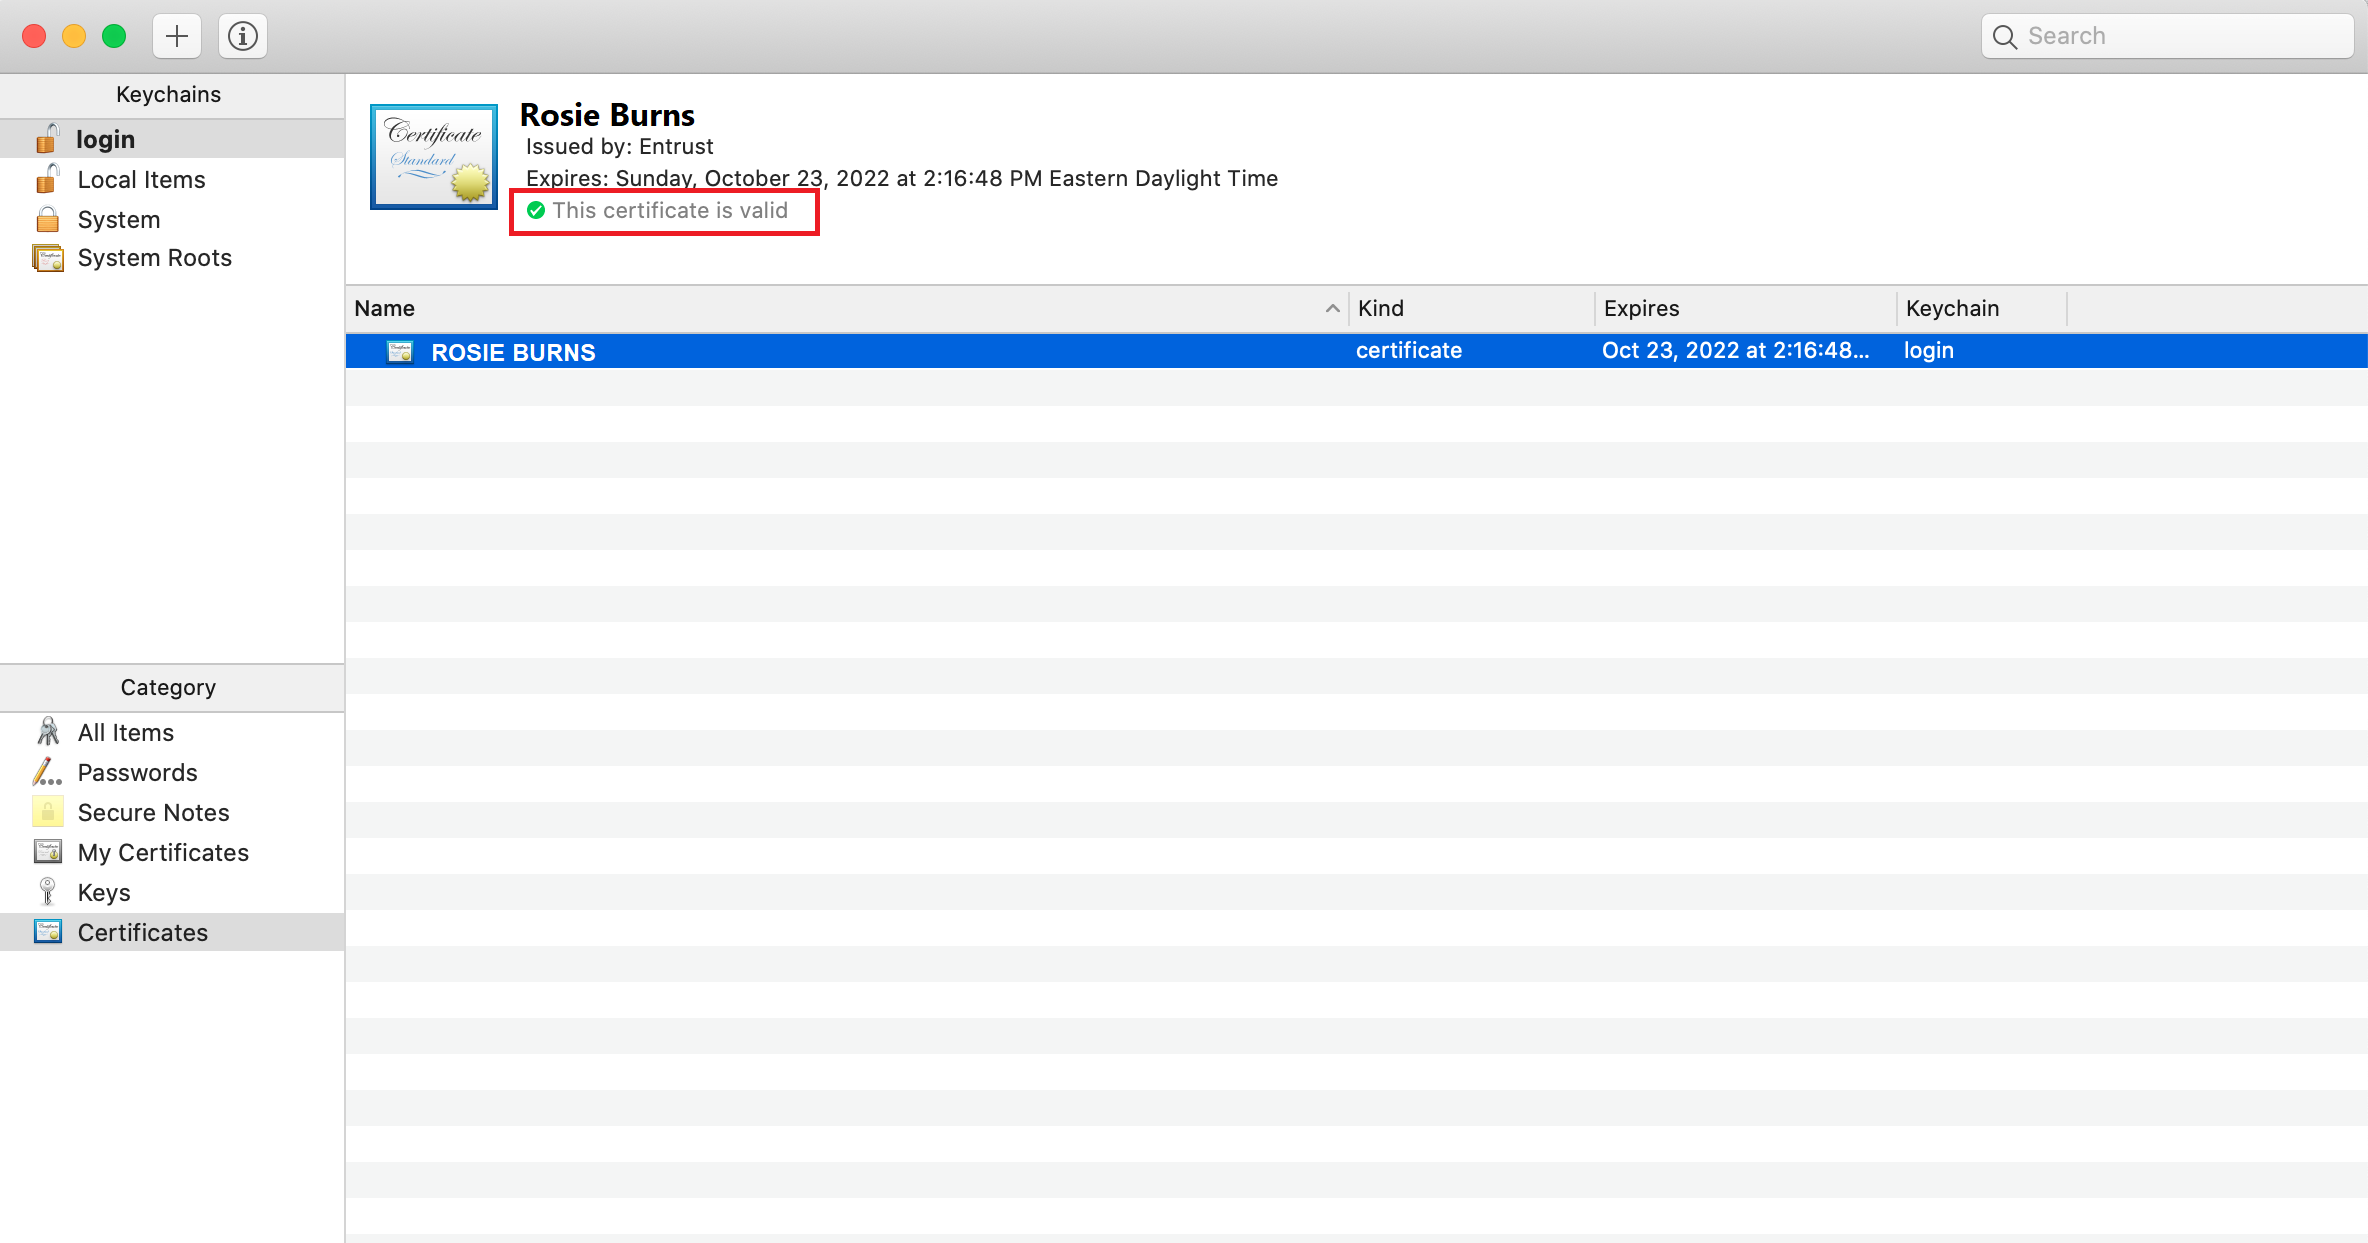
Verify Migration on macOS
- Click the Spotlight icon and search for Keychain Access.
- Double-click the Keychain Access icon to open the application.
- In the left navigation, click the Login keychain.
- Browse to and select any of the certificates found on your PIV credential (the Name column displays your name).
- Verify the This certificate is valid message appears beneath the certificate details.
Note: It’s okay if a different name appears in the keychain access screen. It should show the name of the user that the PIV certificate was issued to. Click for a larger version
Frequently Asked Questions
If your question does not appear in this list, send it to fpki@gsa.gov.
What happens if I don’t distribute the FCPCAG2 root certificate in my environment?
-
(High Impact) Authentication failures
- Workstations
- Websites
- Applications (internal and cross-agency)
- Virtual Private Networks (VPNs)
-
(Medium Impact) Error fatigue
- Unexpected application errors and system behavior for legacy and government-off-the-shelf (GOTS) products
-
(Low Impact) Digital signature validation failures
- Documents and files (for example, Microsoft Word)
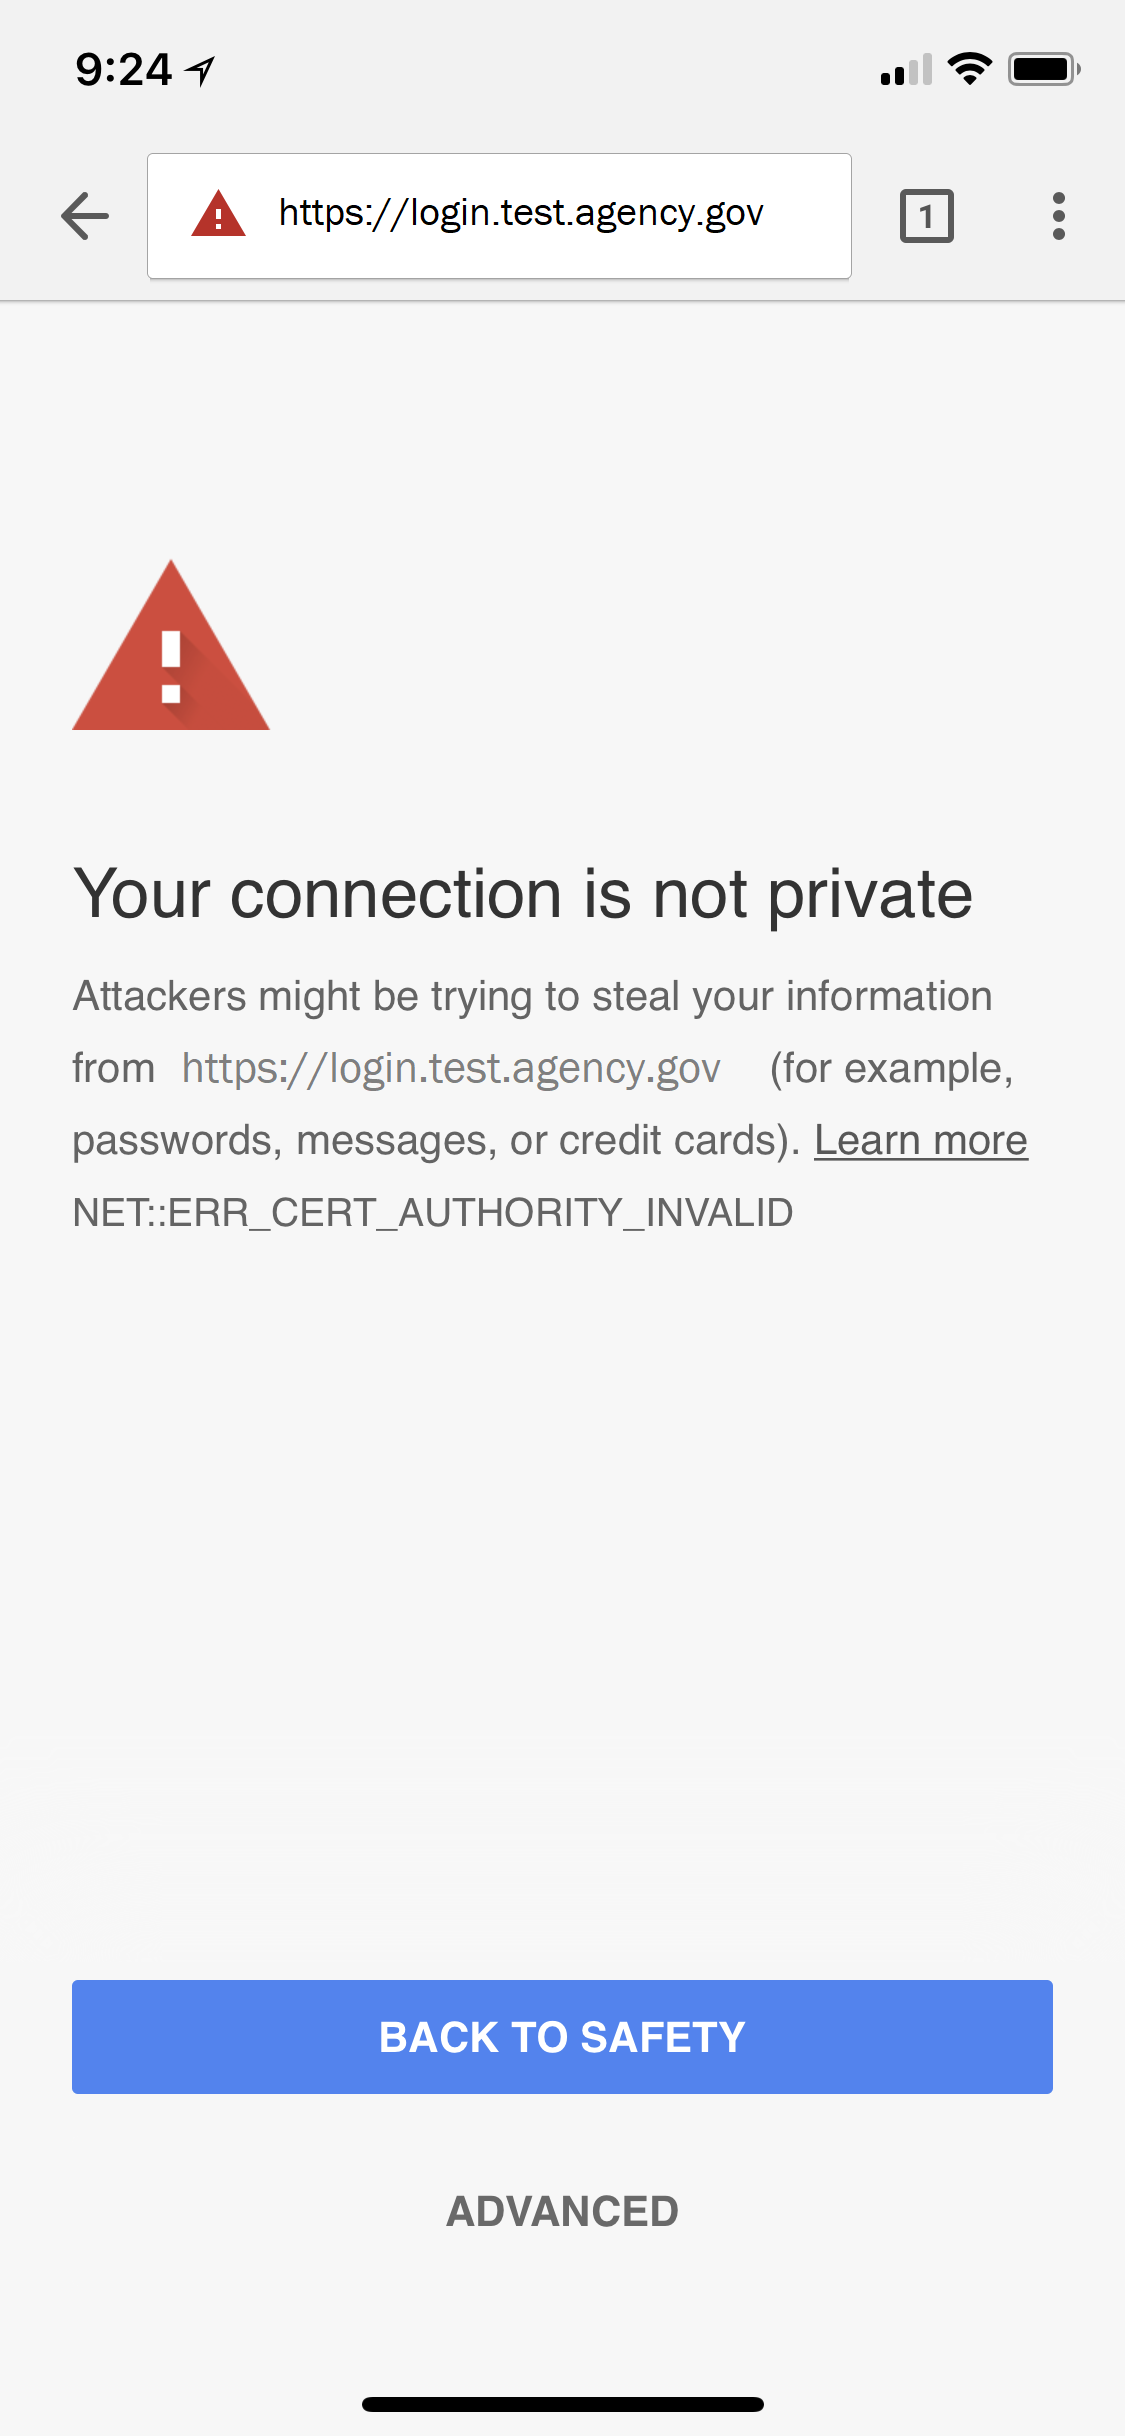
What errors can occur in Windows if I don’t distribute the FCPCA root certificate?
Sample Chrome error when a user navigates to an intranet site whose SSL/TLS certificate doesn’t chain to a trusted root CA: Click for a larger version
Sample Chrome error when PIV authentication fails because the user’s certificate doesn’t chain to a trusted root CA: Click for a larger version
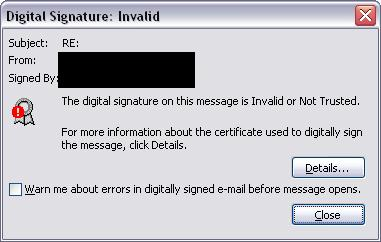
Sample Microsoft Outlook error when a digital signature certificate for an email doesn’t chain to a trusted root CA: Click for a larger version
What errors can occur in macOS if I don’t distribute the FCPCA root certificate?
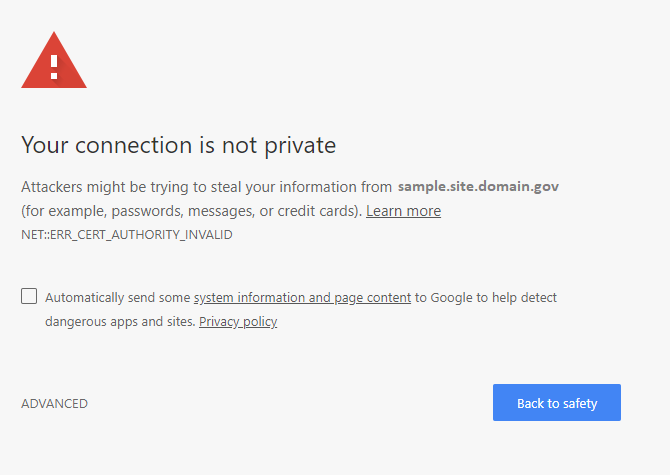
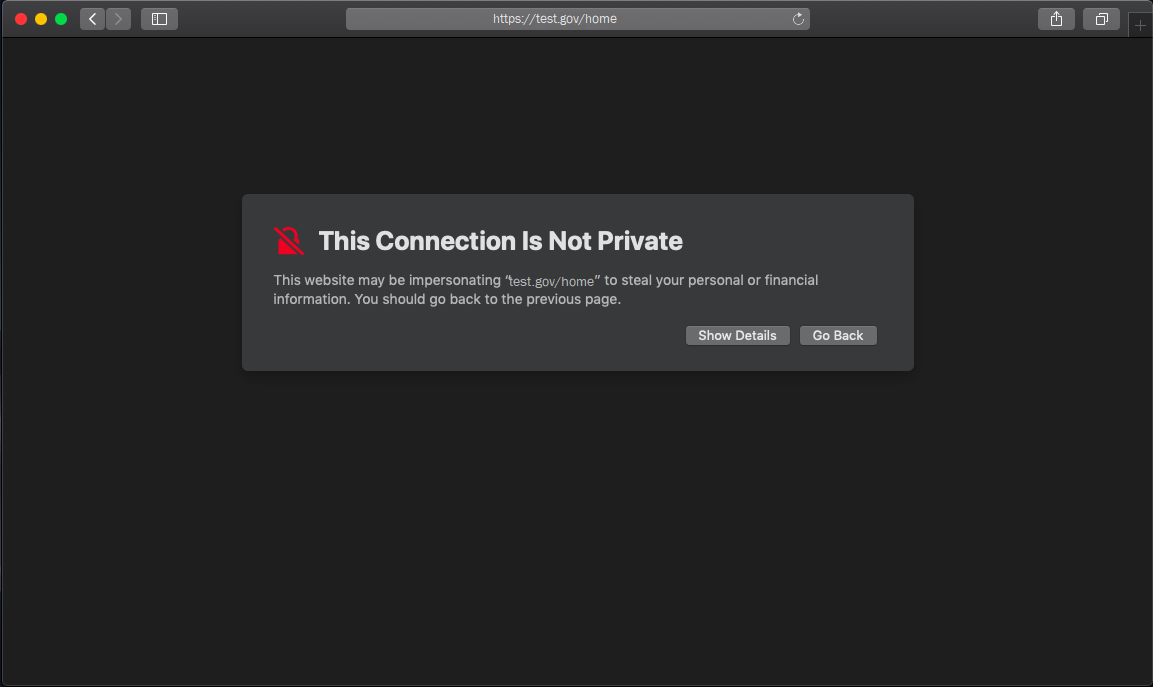
Sample Safari error when a user navigates to an intranet site whose SSL/TLS certificate doesn’t chain to a trusted root CA: Click for a larger version
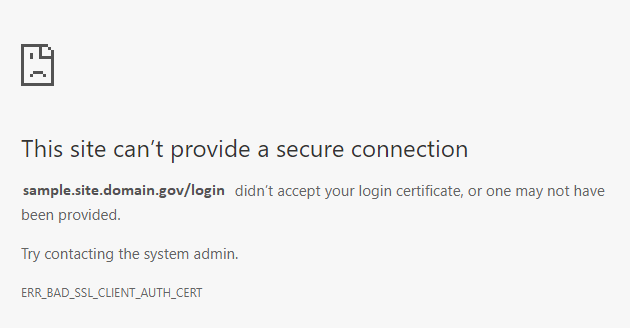
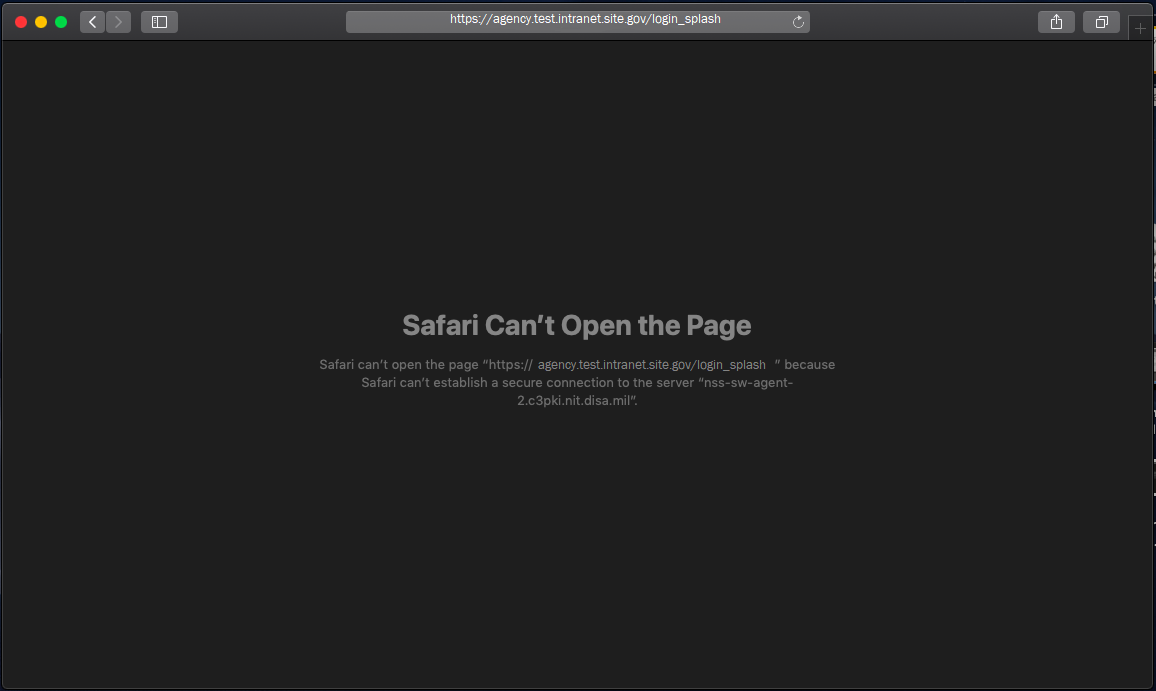
Sample Safari error where client (PIV) authentication fails because a user’s certificate doesn’t chain to a trusted root CA: Click for a larger version
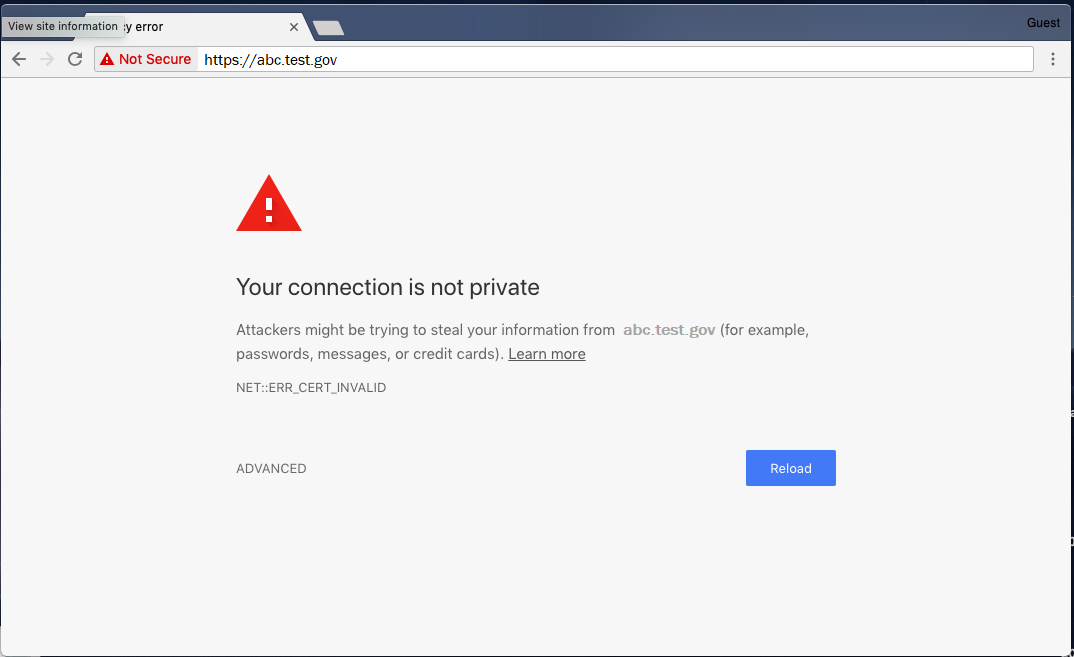
Sample Chrome error when a user navigates to an intranet site whose SSL/TLS certificate doesn’t chain to a trusted root CA: Click for a larger version
Sample Chrome error where client (PIV) authentication fails because a user’s certificate doesn’t chain to a trusted root CA: Click for a larger version

What errors can occur in iOS if I don’t distribute the FCPCA root certificate?
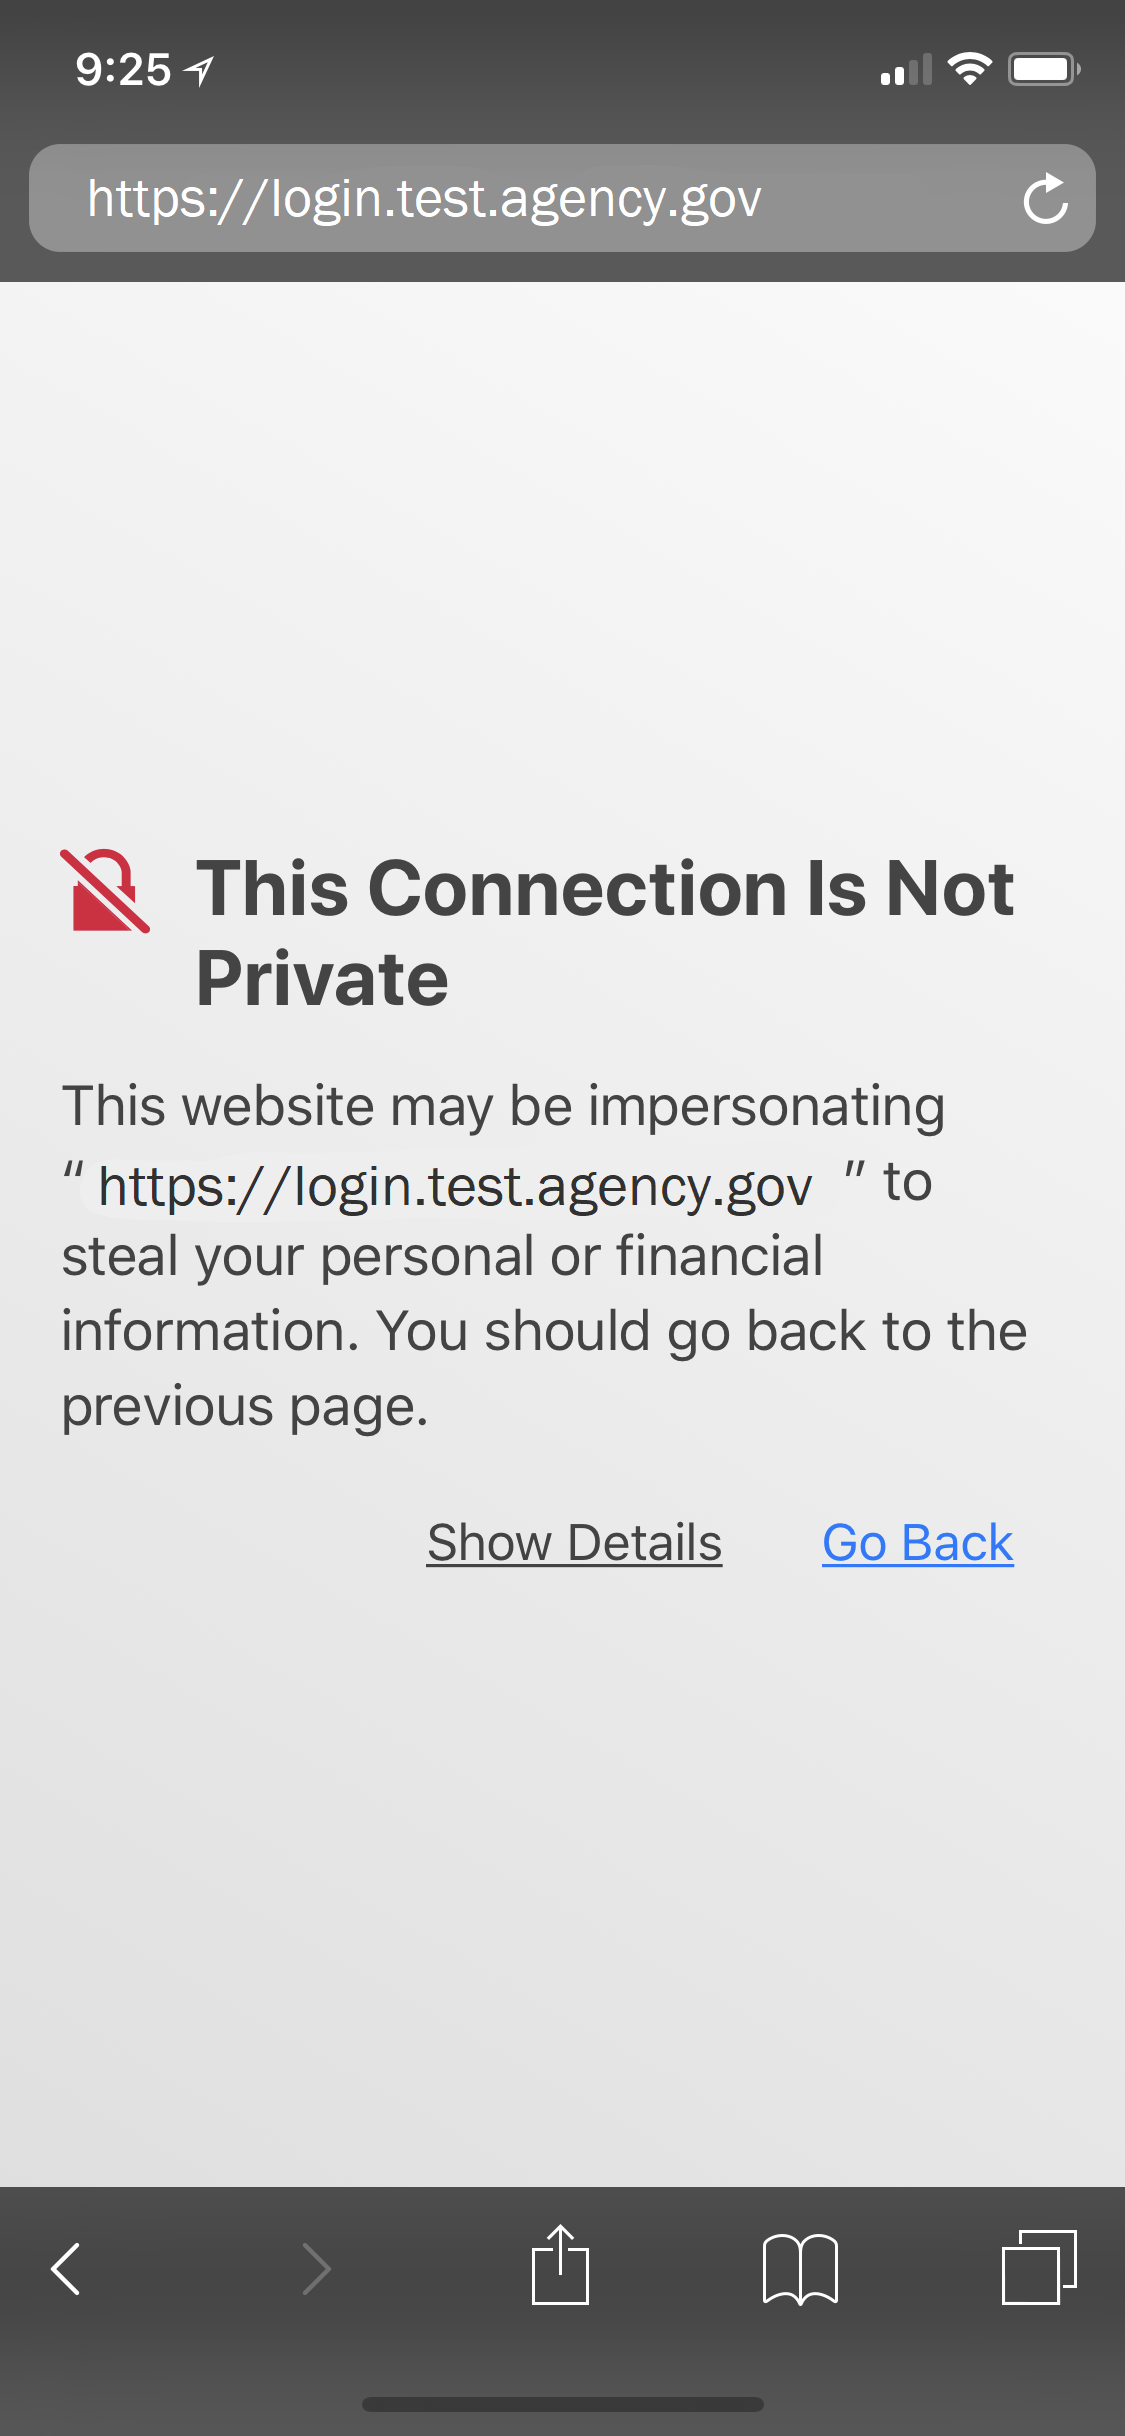
Sample Safari error when a user navigates to an intranet site whose SSL/TLS certificate doesn’t chain to a trusted root CA: Click for a larger version
Sample Chrome error when a user navigates to an intranet site whose SSL/TLS certificate doesn’t chain to a trusted root CA: Click for a larger version
How can I verify that the FCPCA root certificate has been successfully distributed to my workstation or device?
Please review the steps to verify distribution of the FCPCA root certificate.
Do I need to distribute the FCPCA root certificate to my Bring Your Own Device (BYOD) program device?
As a BYOD program device user, you’ll need to distribute the FCPCAG2 root certificate if you:
- use your PIV credential to log into intranet sites or VPNs,
- validate PIV digital signatures in emails or documents, or
- navigate to intranet pages whose SSL/TLS certificates chain to the FCPCAG2 root certificate.
How do I configure my unmanaged Windows system to trust the new Federal Common Policy CA?
- Download a copy of the FCPCA certificate from http://repo.fpki.gov/fcpca/fcpcag2.crt
- Download the bundle of FPKI intermediate CA certificates for unmanaged devices (fpki-unmanaged-bundle.p7b)
- Update your Trust Store:
- Click Start, type certmgr.msc, and press Enter.
- Right-click Trusted Root Certification Authorities (on the left-hand navigation), and select All Tasks > Import. Click Next once the Certificate Import Wizard opens.
- Browse to and select your copy of the FCPCA root certificate. Click Next several times until the certificate import process is complete.
- When prompted, verify the certificate thumbprint matches 99B4251E2EEE05D8292E8397A90165293D116028 (additional spaces may appear depending on your Windows Version).
- Click Yes.
- Right-click Intermediate Certification Authorities (on the left-hand navigation), and select All Tasks > Import. Click Next once the Certificate Import Wizard opens.
- Browse to and select your copy of fpki-unmanaged-bundle.p7b, making sure “All Files” are presented to view the .p7b file (this appears in a drop-down box next to the “File Name” input box). Click Next several times until the certificate import process is complete.
To verify your distribution (assumes certmgr.msc is still open):
- Verify an entry for the FCPCAG2 root certificate
- Use the left-hand navigation to browse to Trusted Root Certification Authorities > Certificates
- Press the F5 key to refresh the folder contents
- Verify an entry exists for the Federal Common Policy CA (both the Issued To and Issued By columns will present “Federal Common Policy CA G2”.)
- Verify entries for the intermediate CA certificates issued by the Federal Common Policy CA G2
- Use the left-hand navigation to browse to Intermediate Certification Authorities > Certificates
- Press the F5 key to refresh the folder contents
- Sort the data by clicking on the Issued By column
- Verify nine (9) entries for certificates issued by the Federal Common Policy CA G2
Note: The following video demonstrates the distribution steps outlined above. Click for a larger version
How do I configure my unmanaged macOS device to trust the new Federal Common Policy CA?
- Download a copy of fpki-unmanaged-bundle.mobileconfig
- Browse to and double-click on your copy of fpki-unmanaged-bundle.mobileconfig.
- Navigate to System Preferences -> Profiles
- Verify the profile contents and click Install (twice)
Note:The following video shows you how to install FCPCAG2 and the intermediate CA certificates using an Apple configuration profile on macOS. Click for a larger version
How do I configure my unmanaged iOS device to trust the new Federal Common Policy CA?
- Launch Safari.
- Navigate to a copy of the fpki-unmanaged-bundle.mobileconfig
System message says: The website is trying to open Settings to show you a configuration profile. Do you want to allow this?
- Click Allow.
- Navigate to Settings -> General -> Profile
- Select the “Distribute FCPCA and Intermediate CA Certificates” profile
- Select More Details and select the certificate entry for the FCPCAG2
- Scroll to Fingerprints and verify the certificate’s SHA-256 hash against the expected value.
- At the top left of screen, click Back and Install Profile. Then, click Install (top right).
- When prompted, enter your device passcode.
- Click Install in the upper right corner, and Install again.
- Click Done.
- Enable full trust for the FCPCA.
Note:The following video shows you how to install FCPCAG2 and the intermediate CA certificates using the Safari web browser. Click for a larger version
How do I configure the Firefox web browser to trust the new Federal Common Policy CA?
The following steps will allow Firefox to use the underlying operating system trust store. Follow these steps only after distributing the Federal Common Policy CA G2 to your Windows or macOS device.
- Open Firefox.
- Enter about:config in the address bar and continue to the list of preferences.
- Set the preference security.enterprise_roots.enabled to true.
- Restart Firefox.
Note:The following video shows you how to configure the Firefox web browser to trust the certificates included in the operating system trust store. Click for a larger version
